|
1.
|
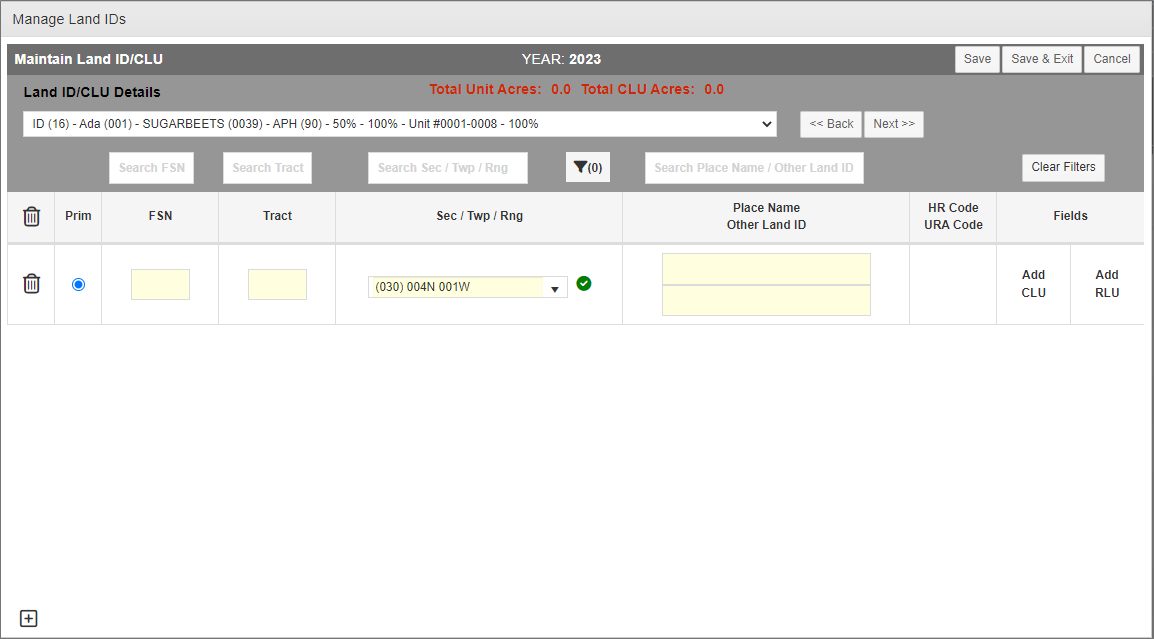
From one of the access points shown in "At a Glance: The Manage Land IDs Popup" open the Manage Land IDs popup for the detail line you need to add a Land ID to. The Manage Land IDs popup opens. The System refreshes the validation statuses and HR/URA Codes for any existing details lines. |
|
2.
|
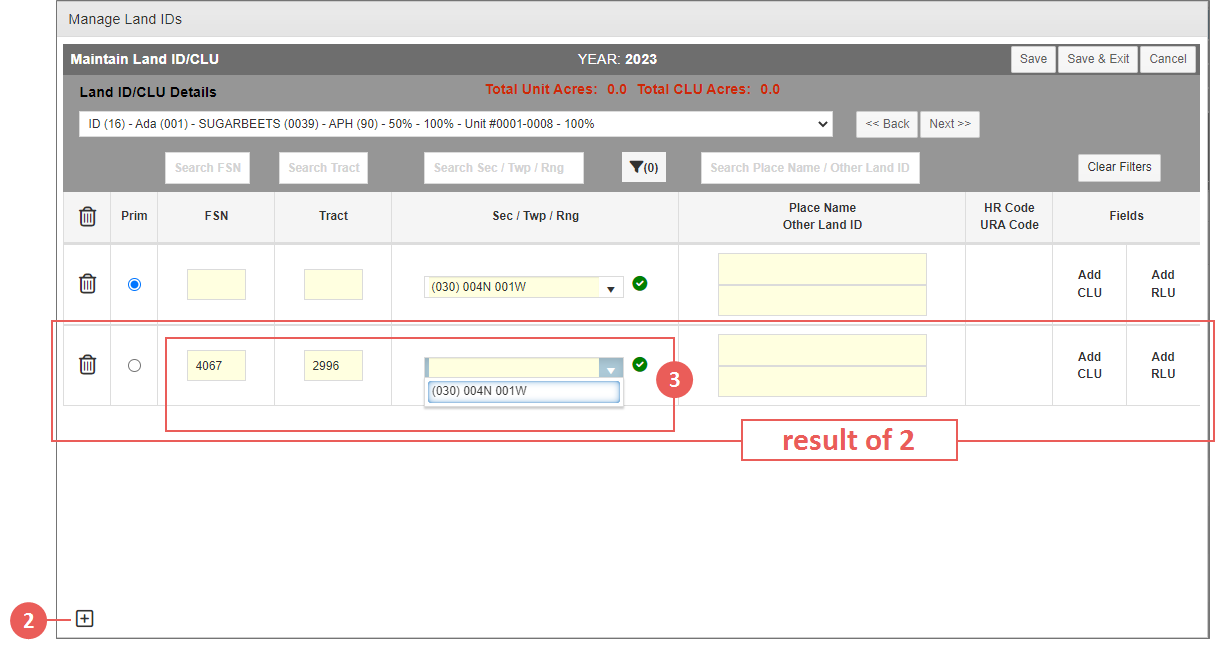
In the bottom left corner, click the + button. A new blank land ID row displays after the last row in the grid. |
|
3.
|
In the new row, enter an FSN or an FSN/Tract and/or Section/Township/Range combination. |
|
a.
|
In the FSN and Tract fields, type the FSN. (An FSN is required if a Tract is provided.) Upon tabbing out of the Tract field, the Sec/Twp/Rng dropdown populates with valid Section/Township/Range combinations for the FSN or FSN/Tract provided. |
TIP: When you edit a field, a yellow vertical line displays to the left to indicate that changes have been made to the row.
|
b.
|
In the Sec/Twp/Rng field, either select a Section/Township/Range combination from the dropdown or key one manually. When a valid FSN and Tract has been keyed and the Section/Township/Range field has only one available selection, the System will default that selection in the dropdown field. |
NOTE: Sec/Twp/Rng must be in SSS TTTd RRRd format, where “S” is Section, “T” is Township, “R” is Range, and “d” is Direction. As a reminder, the Township must be designated as “N” (North) or “S” (South), and the Range must be either “E” (East) or “W” (West). For example, if the user enters “9 24n 24e”, the System converts this entry to “(009) 024N 024E”. When applicable to some Ohio counties, the System supports non-conventional Township/Range order (i.e., flipped).
Once the FSN or FSN/Tract and/or Section/Township/Range has been entered, the System checks the Land ID against internal Land ID Tables using the CLU Web Service. To learn why a Land ID could not be validated, hover over the validation icon to view the explanation as a tool tip. (The System will still allow the Land ID to be saved without validation since there is sometimes a lapse in receiving information from the RMA.)
|
4.
|
If applicable, in the Farm Name/Other Land ID column, using up to 50 characters in each field, type a Place Name in the top field and an “other” Land ID in the bottom field. The Other Land ID is typically used in those areas that are not part of the PLSS, as with Spanish Land Grants. |
|
5.
|
The HR Code column is read-only. When you save a new Land ID containing a Section/Township/Range, the System will determine the High Risk (HR) Code by checking the HR Land Table and displaying "C" when land is located entirely in a Map Area (may or may not be High Risk), "H" when land is located entirely in a High Risk Area, "P" when land is partially located in a High Risk Area, or "V" when land has been verified as not being located in a High Risk Area. The HR Codes and their descriptions are displayed when hovering over the HR Code column heading. Continue to step 6. |
|
6.
|
The URA Code column is read-only. This column is populated on save of the Land ID with a “P” if the Land ID is partially unrated or “C” if the Land ID is completely unrated. Otherwise it will be blank. |
|
8.
|
The RLU link opens a row for adding a resource land unit. RLUs are explained in "Add an RLU ID". |
|
9.
|
As your next step, click one of the following buttons: |
|
•
|
Save: Changes are saved and the user remains on the Manage Land IDs popup. |
|
•
|
Save & Exit: Changes are saved and the user is returned to the point of access. The Land ID shown in the point of access has been updated to display the added Land ID. |
|
•
|
Cancel: Changes are not saved, the Manage Land IDs popup closes, and the user is returned to the point of access. |

