Related
Plant, View, & Maintain Fields with Mapping
All Reinsurance Years
Once fields have been associated with a policyholder, they can be planted and then maintained as needed. To better view the fields associated with a grower, a user can also choose how fields are displayed and assign unique field names.
There are two ways to plant fields within mapping:
| • | The Standard Planting functionality allows you to plant field by field and include additional unit information, such as ACRSI or Perennial details, when applicable, and view more field details. |
| • | The Fast Planting functionality allows you to plant multiple fields at once. |
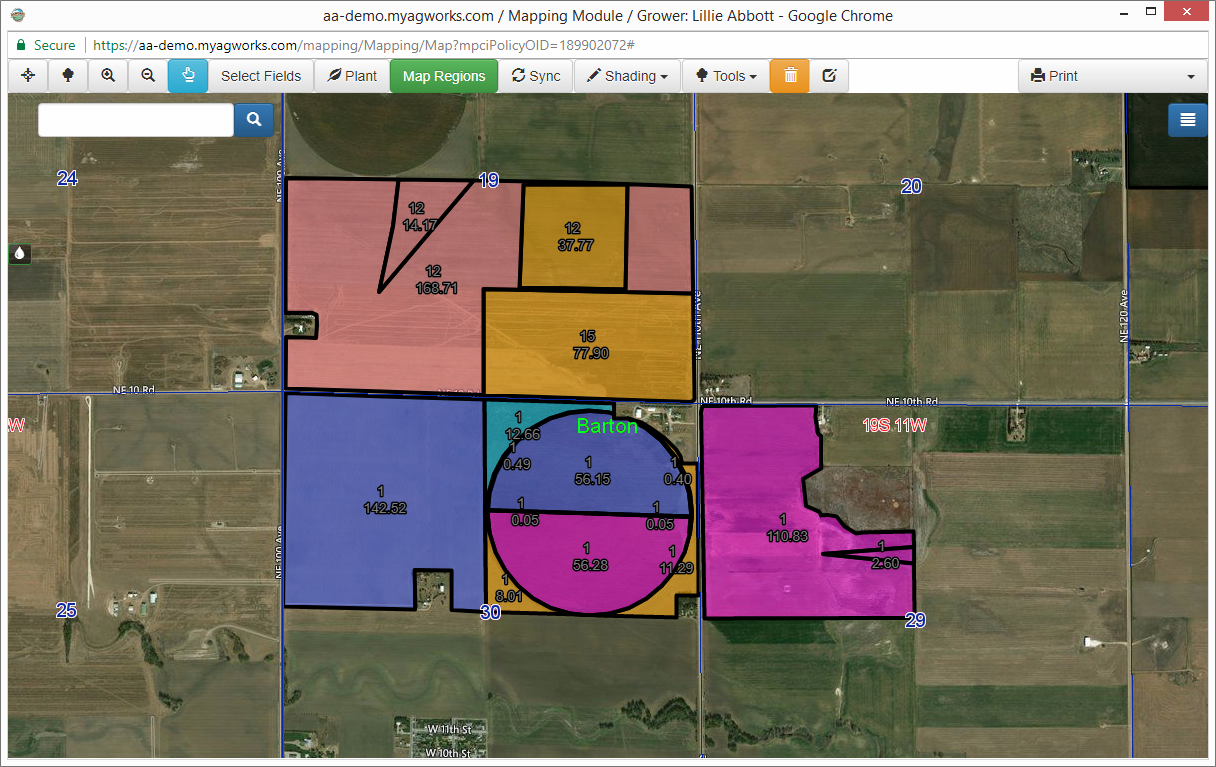
| 1. | Open the policy for the grower and select the Map tab. The Mapping window opens for the policyholder and zooms to a view of the fields associated with them. The associated fields are highlighted in transparent orange. |
| 2. | In the Map window, click on the field that you need to plant. The field is highlighted in solid orange. |
| 3. | Click Plant. The Plant panel for the field opens on the Assign Crop tab. The number of current plant records associated with the selected field(s) is shown below the Assign Crop tab between the arrow buttons (e.g., "1 of 2"). |
| • | To view all commodities covered by RMA, select All RMA. |
| • | To view all commodities covered through insurance by FSA, select All FSA. |
| 5. | To force the System to match the Land ID on the selected field back to the coverage, mark the Force Land ID Match checkbox. The System will attempt to match land IDs as follows: |
| • | If the field has only a legal description (e.g., Section/Township/Range), then it will match on legal only. This is for fields that are drawn or imported that do not contain a Farm Number or Tract Number. |
| • | If the legal on the field only contains an Farm Number/Tract, then it will match on Farm Number/Tract. This is for fields that are not in a PLSS area with Sections. |
| • | If the field has a Farm/Tract/Section/Township/Range, then it will look for units containing the full legal description. |
| • | If the field has no legals, then it will not be able to match on legals. |
| 6. | After selecting a Commodity, the Assign button is enabled. Click Assign to assign the crop to the field. A popup will confirm the assignment. |
Policy/Unit Section
| 7. | From the Policies dropdown, select the policy the field is related to. The dropdown will include all the grower’s policies for that State/County that match the Commodity selected. Once a selection is made, the System updates the coverage dropdown based on the units found on the policy. |
| 8. | From the Coverage dropdown, select the coverage the field is related to. The System only displays coverages specific to the policy selected. Once a selection is made, the System updates the Premium Line dropdown to show only lines available to the coverage and the Commodity dropdown displays the crop found on the chosen coverage. |
| 9. | From the Premium Line dropdown, select the premium line for the field. The System will only include those premium lines on the coverage selected in the previous step. |
NOTE: If the unit isn't displaying in the dropdown and the Force Land ID match checkbox is selected, then the land IDs may be off
NOTE: If the coverage is PRF. the Premium Line dropdown displays as "Unit Group" and will populate with the Available Grid IDs insured on the selected coverage. Because PRF can cross county lines, it's recommended the Force Land ID match checkbox not be selected.
NOTE: If a Shareholder exists on the premium line/unit group, the Shareholder name and Share percentage display below the premium line/unit group selection.
| 10. | If the Premium Line selected is for a Perennial crop and PAW associated with the line, the PAW Line field displays and available PAW(s) display. PAW information keyed on the server side, including Density and Stand Percent, is displayed for each PAW in the dropdown. Select the correct PAW for the field. |
Planted Acreage Section
| 11. | The Planted Acres field is populated with the CLU acres assigned to the selected field. Use the spinner to change the number of acres being planted. This value will carry over to the detail line when the Sync to AR functionality is run. |
| 12. | To track planted acres that are Added Land, select the corresponding checkbox. |
| 13. | When the crop is Cotton, a Plant Pattern field displays. From the dropdown, select the planting pattern for the Cotton coverage. |
| 14. | In the Plant Date field, enter the date the commodity was planted using DD/MM/YYYY format or click the calendar button to open the calendar popup and select a date. |
NOTE: If the planting data was populated with PrecisionAg data, a red indicator displays next to this field.
| 15. | If needed, in the Sub Field ID field, type a number to use for identifying the sub field. |
| 16. | If the Planted Acres and/or Plant Date are revised values, mark the Revised checkbox. |
| 17. | If the Planted Acres are prevented planting acreage, mark the PP checkbox. |
| 18. | If the Planted Acres are high risk acreage, mark the HR checbox. |
| 19. | If applicable, select an Acreage Type to assign the field. |
| 20. | If applicable, select the reason the acreage is uninsurable from the UI Reason dropdown. |
Perennial Section
| 21. | To include a name for the block, type it in the Block Name field. |
| 22. | To include a block number, type it in the Block Number field. |
| 23. | The Variety dropdown is determined by the Commodity selected and only populates with options if they were established in the Manage Shading & Logo panel. If applicable, from the dropdown, select the variety to assign to the field (see "Set Up Shading & Logos" for more information on using varieties in Mapping). |
| 24. | To include rootstock information, type it in the Rootstock field. |
| 25. | To include an interplanted crop, type it in the Interplanted field. |
| 26. | To include the Set Out Date, enter the date in YYYY format. |
| 27. | To include the Grafted Date, enter the date in YYYY format. |
| 28. | In the Number of Plants field, type the number of trees/vines included in the block. |
| 29. | From the Plant Pattern field, select the pattern of planting used with the acreage. |
| 30. | In the Plant Spacing field, the spacing used when planting the block. |
| 31. | From the Insurable dropdown, select whether the acreage is "insurable" or "uninsurable". |
ACRSI Section
| 32. | If applicable, select an FSA Type to assign to the field. |
| 33. | If applicable, select an Intended Use for the field's acreage. |
| 34. | If applicable, select a Cropping Practice for the field's acreage. |
| 35. | If applicable, select the Practice for the field's acreage. |
| 36. | If applicable, select he Organic Practice for the field's acreage. |
| 37. | Click Assign to save the changes made to the field. If a Shading/Hatch was established for the Crop/Type/Practice/Variety, then the field displays with those colors. |
| 38. | If another plant record is available for planting, click the right arrow to continue planting. Repeat steps 4 - 37 for each additional plant record you need to add. If you need to add an additional plant record, click +. The number of the available print records increases by one (e.g., "1 of 2" changes to "1 of 3"). Repeat steps 4 - 37 for each plant record you need to add. |
Using hierarchical data matching, the System will attempt to match the FSN/Tract/Field and Fast Plant criteria (at a Crop or Crop/Type/Practice level) to information stored in the land ID record on the premium line. The System will default as many required remaining selections as possible on the field line in the grid.
NOTE: Once planting data has been entered, you can sync the information back to the System from within the Fast Edit Planting panel via "Sync to AR via Fast Edit Planting/Batch Sync"
| 1. | Open the policy for the grower and select the Map tab. The Mapping window opens for the policyholder and zooms to a view of the fields associated with them. The associated fields are highlighted in transparent orange and labeled with their CLU Acres. |
| 2. | In the Map window, hold SHIFT and click each field that you want to add planting information for. The fields are highlighted in solid orange. |
| 3. | Click Plant. The Fast Edit Planting panel for the field opens and displays all selected fields. |
NOTE: To view all fields on the coverage regardless of selection, click Show All Fields. The grid refreshes to displays all fields.
| 4. | To apply a single Crop/Type/Practice to multiple fields in the Fast Edit Planting panel, in the top section of the panel, select the crop you are reporting from in the Crop dropdown. This dropdown is populated with the crops from all active coverages on the policy. |
NOTE: If Pasture, Rangeland, Forage is selected, the System refreshes to only display the fields required for PRF reporting: Policy, Coverage, Unit Group (Intended Use, Grid ID, and FSN/Tract), and Planted Acres.
NOTE: If a Perennial crop is selected, the System refreshes to display the field required for Perennials as well as the PAW questions and ability to add a PAW signature date.
| 5. | If the crop is related to coverages with multiple types and practices, it may be advantageous to apply additional Type and Practice selections in the Fast Plant selection. In most cases, however, it’s best to use Crop only when entering criteria in the Fast Edit Planting section. |
| 6. | Select all units in the grid that you want to plant with the selected criteria. |
TIP: To speed keying of planted acres, you can select all field details except Planted Acres and Planted Date, click save, and then return to quickly key planted acres and dates
For each field you are planting, complete the following steps in the field grid:
| 7. | Verify the Crop planted on the field. |
NOTE: If Pasture, Rangeland, Forage is selected, the System refreshes to only display the fields required for PRF reporting: Policy, Coverage, Unit Group (Intended Use, Grid ID, and FSN/Tract), and Planted Acres.
| 8. | If no Policy/Coverage/Premium Line were automatically matched by the System, make the appropriate selection. |
TIP: You may need to Sync fields from the System to the Mapping module to see up-to-date Policy/Coverage/Premium Line information. Click Synchroize to
| 9. | Type the Planted Acres and Planted Date in DD/MM/YYYY format or use the calendar button to select the plant date. While not needed at save of a plant record, this data is required when a crop is selected for the field or if Prevented Planting, mark the PP checkbox. |
NOTE: If the Plant data was brought over by Precision Ag, then "Precision Ag" displays to the right of the Planted Date field.
| 10. | To report the acreage as uninsurable, from the UI Reason dropdown, select the reason why the acreage can be classified as uninsurable. |
| 11. | If the land is in a high risk map area, mark the HR checkbox. |
| 12. | From the Acreage Type dropdown, select the acreage record type for the field. |
| 13. | If applicable, in the Sub Field ID field, type the sub field number assigned to the field. |
| 14. | To track planted acres that are Added Land, select the corresponding checkbox. |
| 15. | To add additional planting record to a field or split the field, click the + that corresponds with the field. A blank row loads below the field. The System will default the Planted Acres on the new line equal to the (CLU Acres - Planted Acres) from the parent line. |
| 16. | When you have completed planting for all fields, click Save Changes. |
| 17. | To sync your changes back to the Acreage Report, select the Show All Fields checkbox is selected, the Signature Date fields and Mark Complete checkbox display. Add Sign Dates, select Mark Complete, and then click Synchronize. |
NOTE: This step replaces the need to use Sync > Sync to AR to push acreage reporting data back to the System for the selected policies. See "Sync to AR via Fast Edit Planting/Batch Sync" for more details.
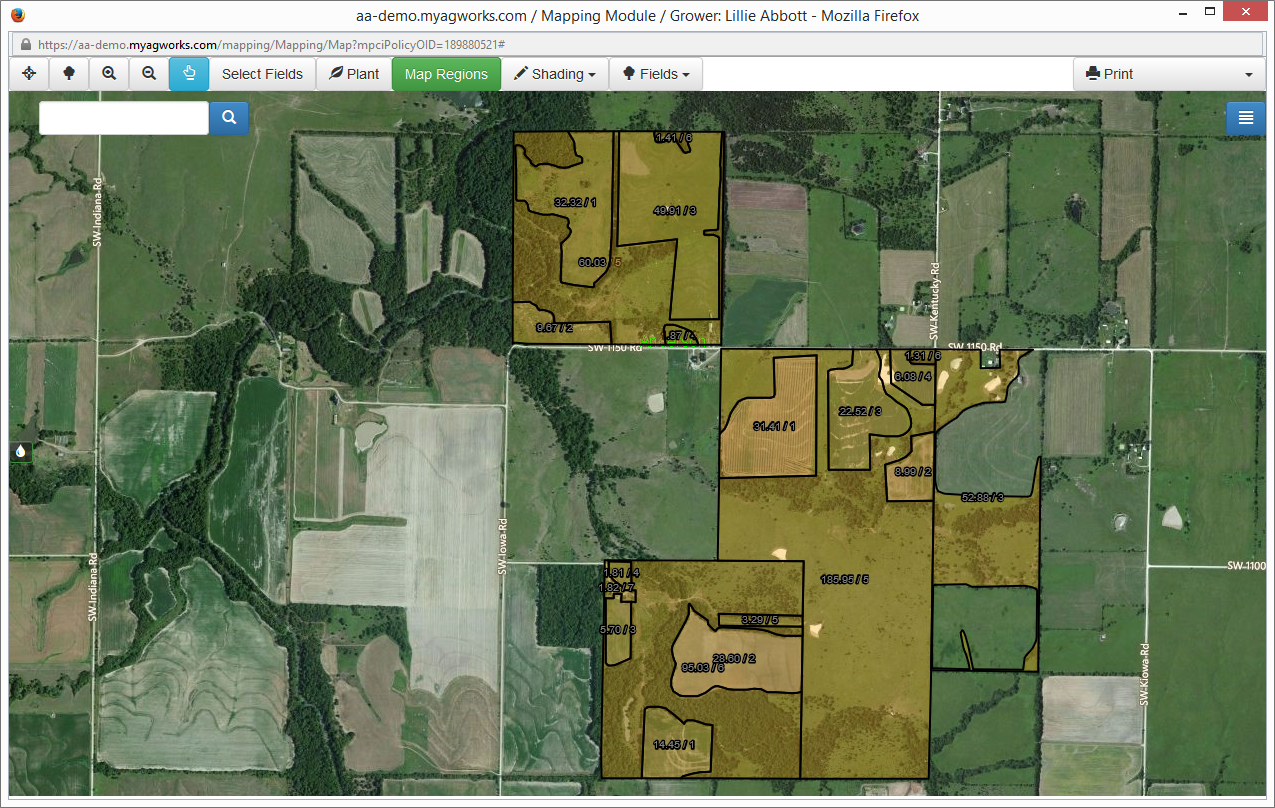
Once fields have been associated with a policyholder, when the mapping window opens, the map zooms to a view of all fields planted for the policyholder rather than just the middle of the county. To view information about a planted field, select a single field and choose from one of the following ways to view fields:
| 1. | By Field Traits: You can change how fields are highlighted on the map, using different field data such as Crop/Practice/Type, FSN, or Unit Number: |
| • | To do this, click Shading. The Shading options display in a dropdown. You can highlight the fields with the following options: |
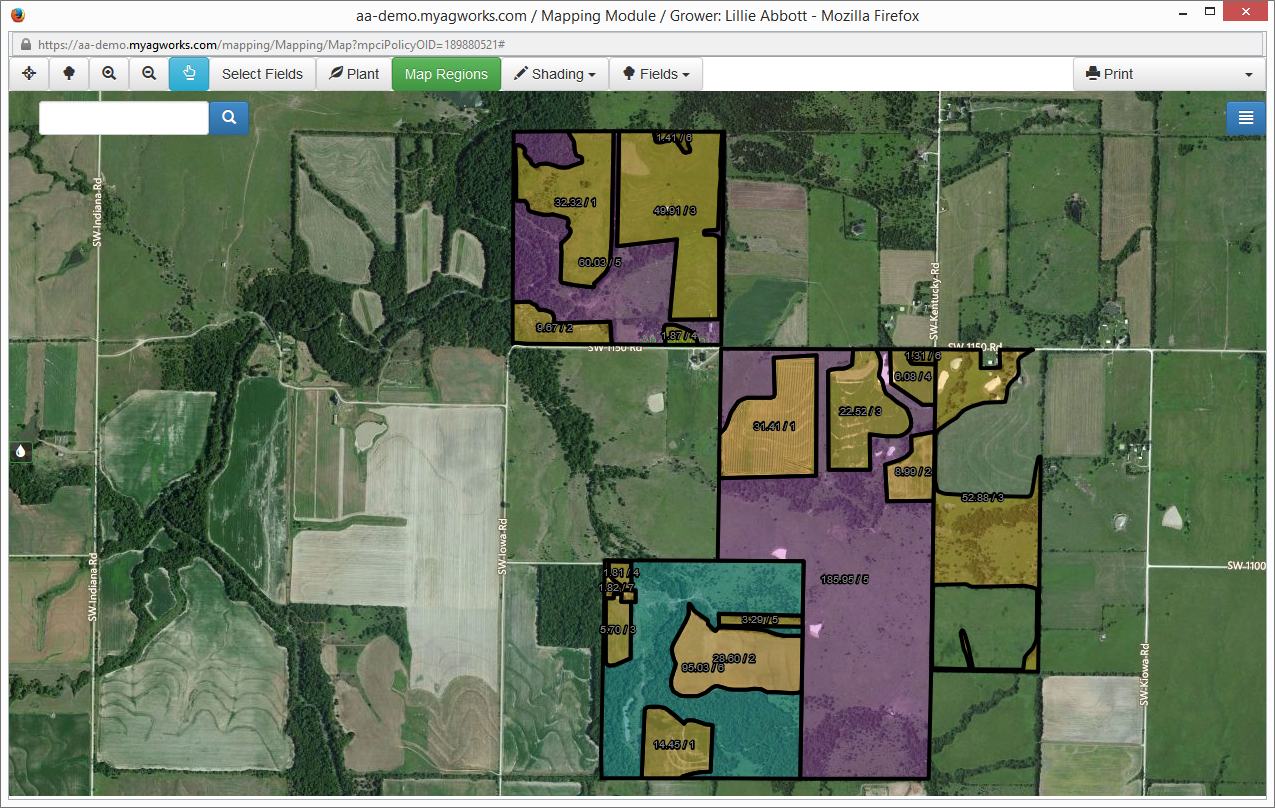
| • | By Crop/Practice/Type: Displays each field in the color/hatch designated for the Commodity/Type/Practice/Variety indicated on the Manage Shading and Logos panel. When viewing the map, only those crops set up in the Shading panel are shown as shaded—all other fields default to the transparent orange. The following example displays two different crops with other fields either not planted or planted with crops that do not have shading established. |
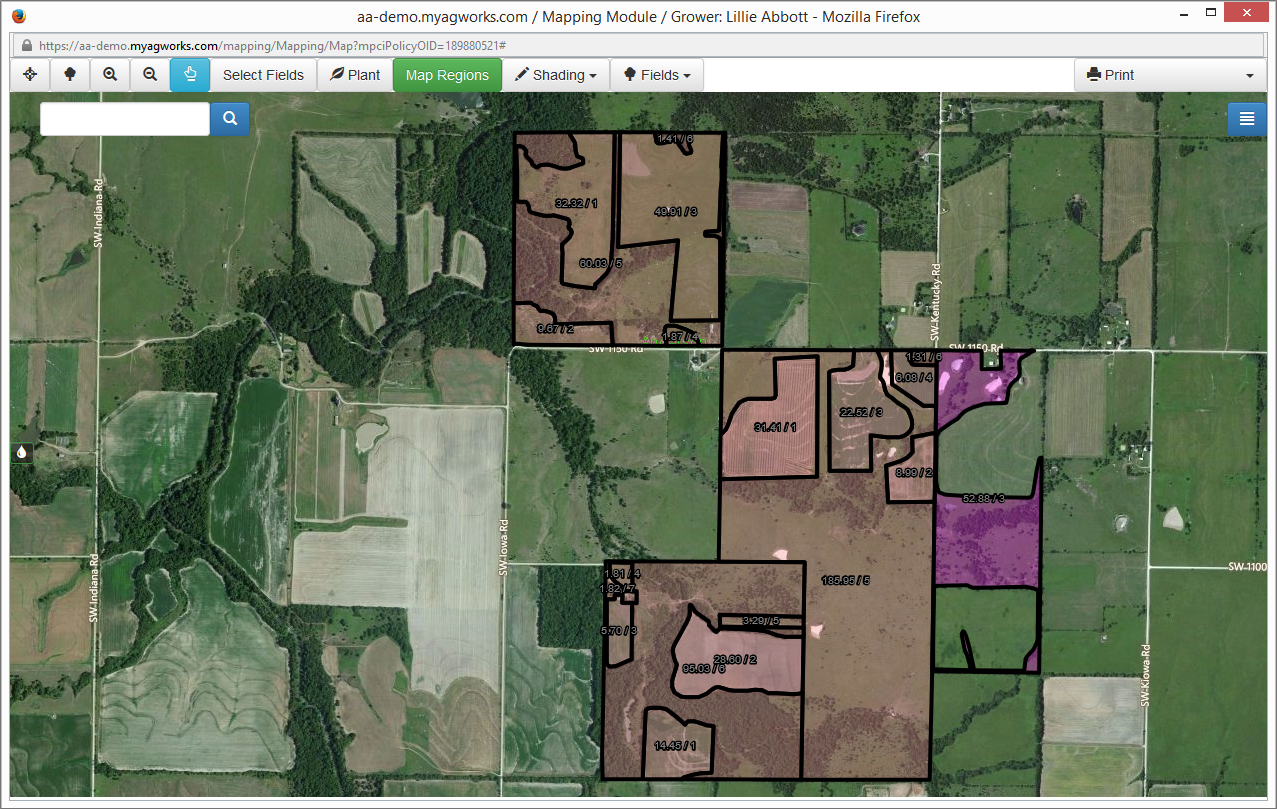
| • | By FN: Displays each different Farm (according to FSA CLU Numbers) in a different color. The following example displays fields with 2 different FNs. |
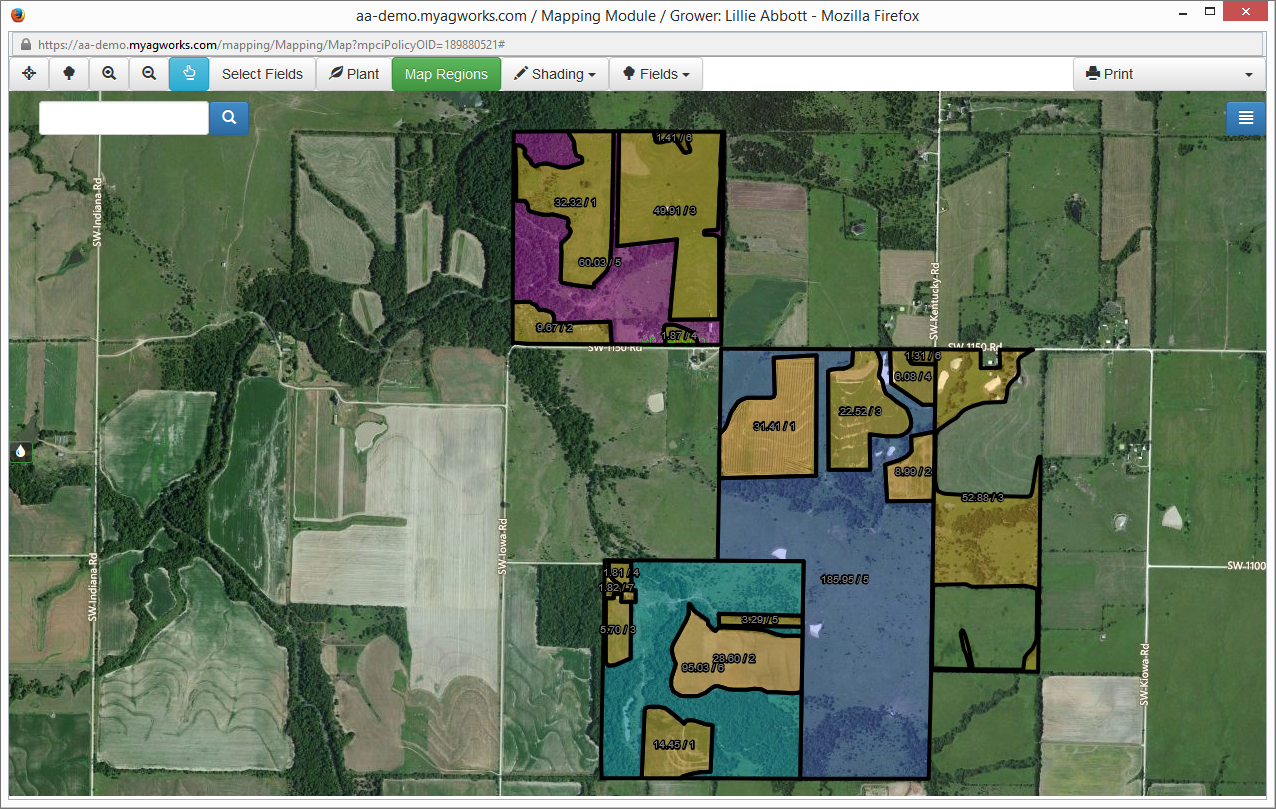
| • | By Unit Number: Displays each unit number as a different color when you’ve assigned a premium line from the policy to the field. The following example displays 3 fields assigned to premium lines (the transparent orange have not been assigned to a premium line). |
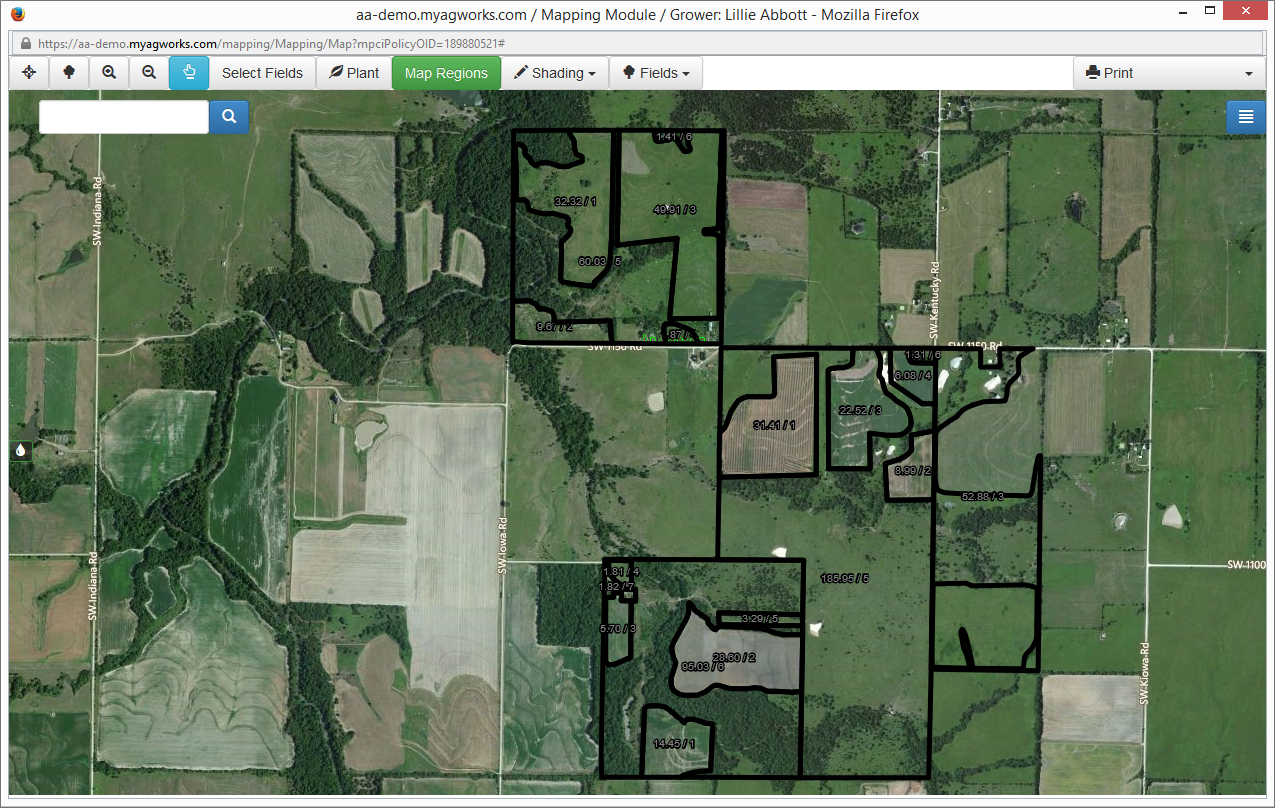
| • | By Transparent: Removes all coloring from fields. Only the outlines display. |
| • | Auto Shade: Displays shading (color, hatch, and/or pattern) according to the variety selected on the plant record. |
| • | Variety: Displays each variety as a different color when you’ve assigned a premium line from the policy to the field. |
| • | None: Displays all fields as transparent orange. When this option is selected and a Map Book or current map is printed, then the legend will not show up on the map. |
| 1. | Open a policy for the grower and select the Map tab. The Mapping window opens for the policyholder and zooms to a view of the fields associated with them. |
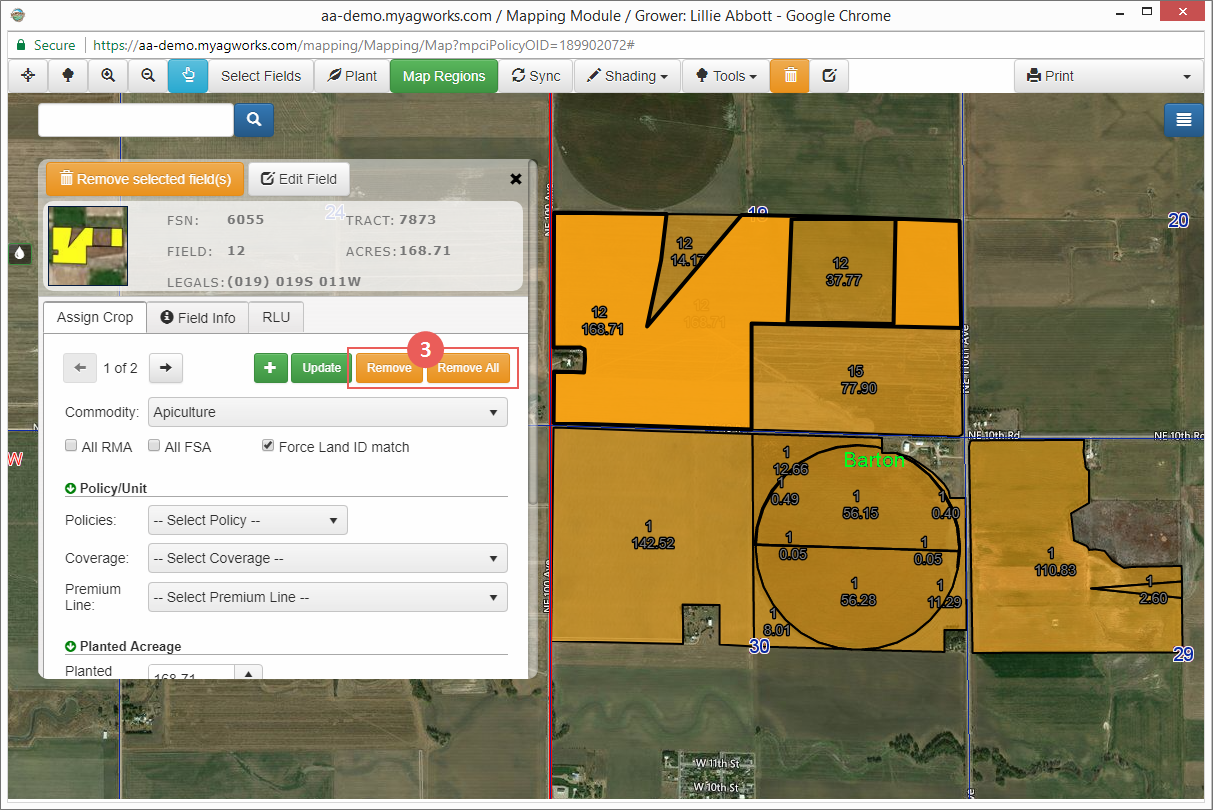
| 2. | In the Mapping window, select the field that you need to remove. The field is highlighted, and the Plant panel opens on the Assign Crop tab. |
| 3. | Make sure the correct field is selected and then click either Remove or Remove All. Remove removes the selected plant record from the selected field for the selected layer; Remove All removes all planted records from the selected field (in the even that multiple plant records have been assigned to the field). |
| 1. | Open a policy for the grower and select the Map tab. The Mapping window opens for the policyholder and zooms to a view of the fields associated with them. |
| 2. | In the Mapping window, select the fields that you need to remove. The fields are highlighted, and the Fast Edit Planting panel opens. |
| 3. | Select the checkbox that corresponds with the fields are usassigning and click Unassign Selected. The System notifies you that fields were removed. |
