To add a Written Agreement detail line,
|
1.
|
Locate and open the policy for the coverage you need to add Written Agreement detail lines to. |
|
2.
|
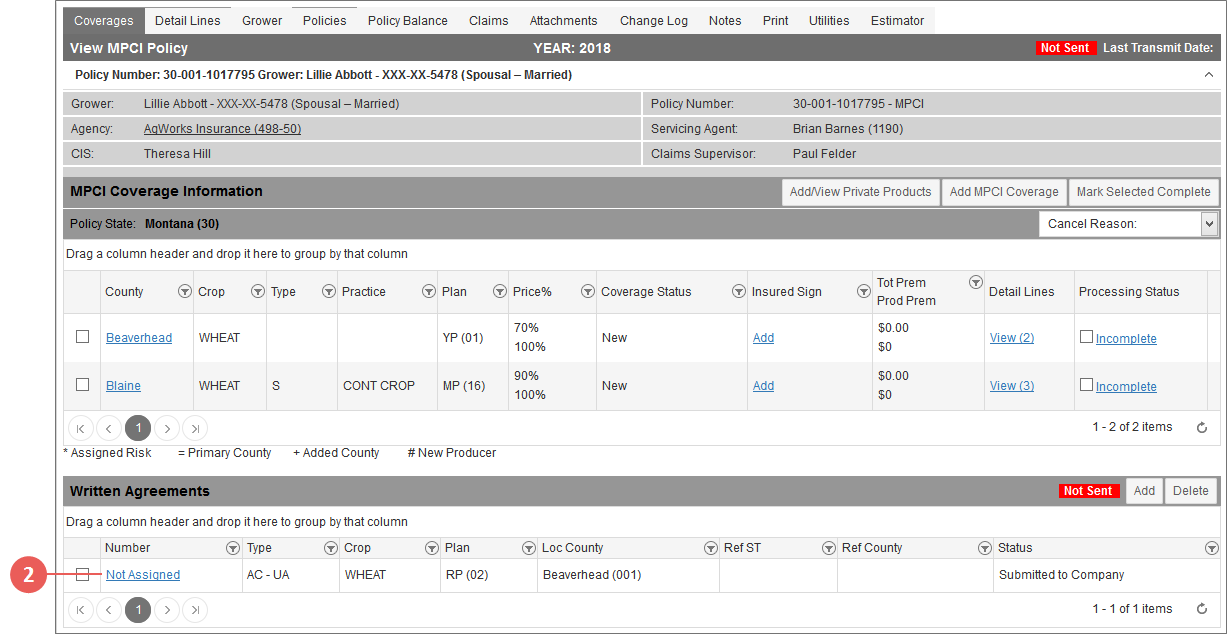
On the Coverages tab, in the Written Agreement section, click the Not Assigned hyperlink in the Number column of the Written Agreement grid. The *Coverage WA tab opens on the View Written Agreement page. |
|
3.
|
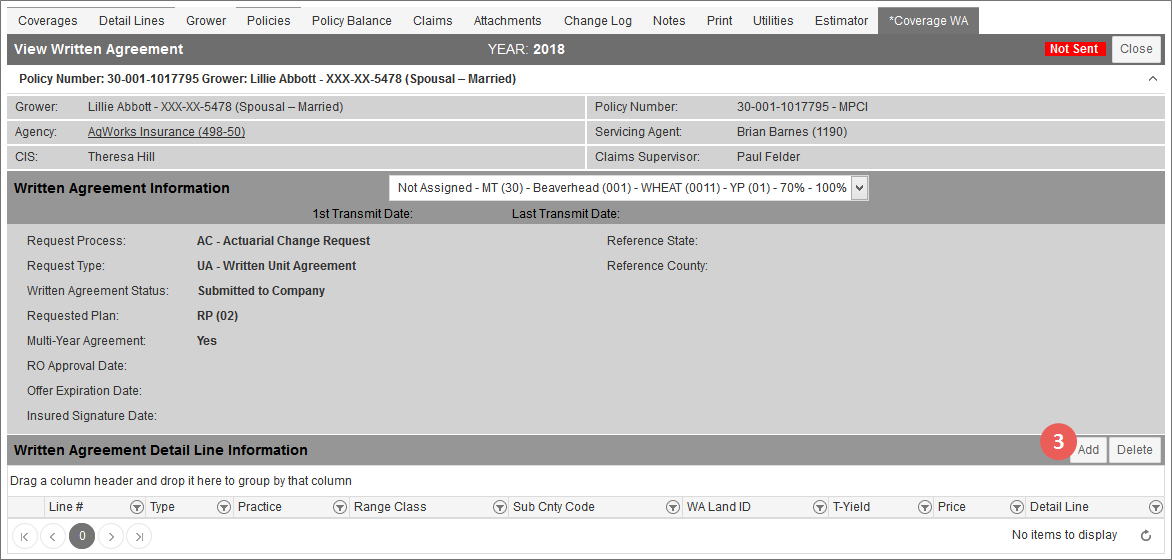
In the Written Agreement Detail Line Information section, click Add. The Maintain Written Agreement Detail Line page opens. While some fields on this page are editable and others are not; the uneditable fields are the fields populated by the WA ADM/ICE tables when there's a match in the System for the WA Request #, WA Land ID (if applicable), and/or Written Agreement #. |
|
4.
|
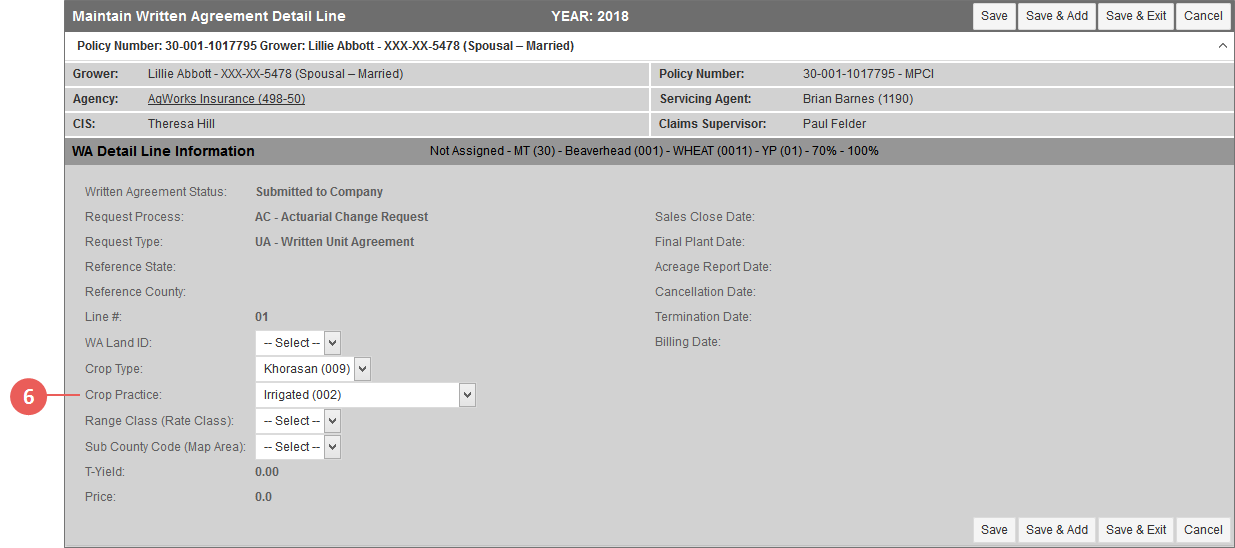
If available, from the WA Land ID dropdown, select a Land ID for the WA. This dropdown is populated with values from the WA Land ID field on the Maintain Written Agreement page. If no values exist in the dropdown, the System has not yet found a match for the WA Request # and/or Written Agreement # for the Written Agreement coverage or a WA Request # and/or Written Agreement # has not been entered and/or the RO hasn't issued a WA Land ID. |
|
5.
|
From the Crop Type dropdown, select the Crop Type requested for the detail line. If a Type was selected when the WA coverage was entered, this field defaults to that selection but can be changed. The Type chosen here is specific only to this detail line. |
|
6.
|
From the Crop Practice dropdown, select the Crop Practice requested for the detail line. If a Practice was selected when the WA was entered, this field defaults to that selection but can be changed. The Practice chosen here is specific only to this detail line. |
|
7.
|
If applicable, from the Range Class (Rate Class) dropdown, select a range/rate class for the WA detail line. This dropdown will only populate if values exist in the ADM for the Type/Practice selected on the detail line. |
|
8.
|
If applicable, from the Sub County Code (Map Area) dropdown, select a sub county code. This dropdown will populate if values exist in the WA ADM or standard ADM for the Policy State/Policy County. |
|
9.
|
As your next step, click one of the following buttons: |
|
•
|
Save: The detail line is saved to the Written Agreement and you remain on the Add New Written Agreement Detail Line page. |
|
•
|
Save & Add: The detail line is saved to the Written Agreement, and a new Add Written Agreement Detail Line page opens so you can add another detail line to the Written Agreement coverage. |
|
•
|
Save & Exit: The detail line is saved to the Written Agreement, the Add Written Agreement Detail Line page closes, and you are taken to the *Coverage WA tab to view the Written Agreement record. In the Written Agreement Detail Information grid, in the Detail Line column for the detail line you just added to the WA, an Apply link is available. From this link, you can apply MPCI detail lines to the new WA detail line. See "Apply an MPCI Detail Line to Written Agreement Detail Line" for more information. |
|
•
|
Cancel: Changes are discarded, the Written Agreement Information page closes, and you are returned to the *Coverage WA tab. |


