|
1.
|
Open the Mapping module for a grower/policy. |
|
2.
|
Select Shading > Manage Shading and Logos. |
|
3.
|
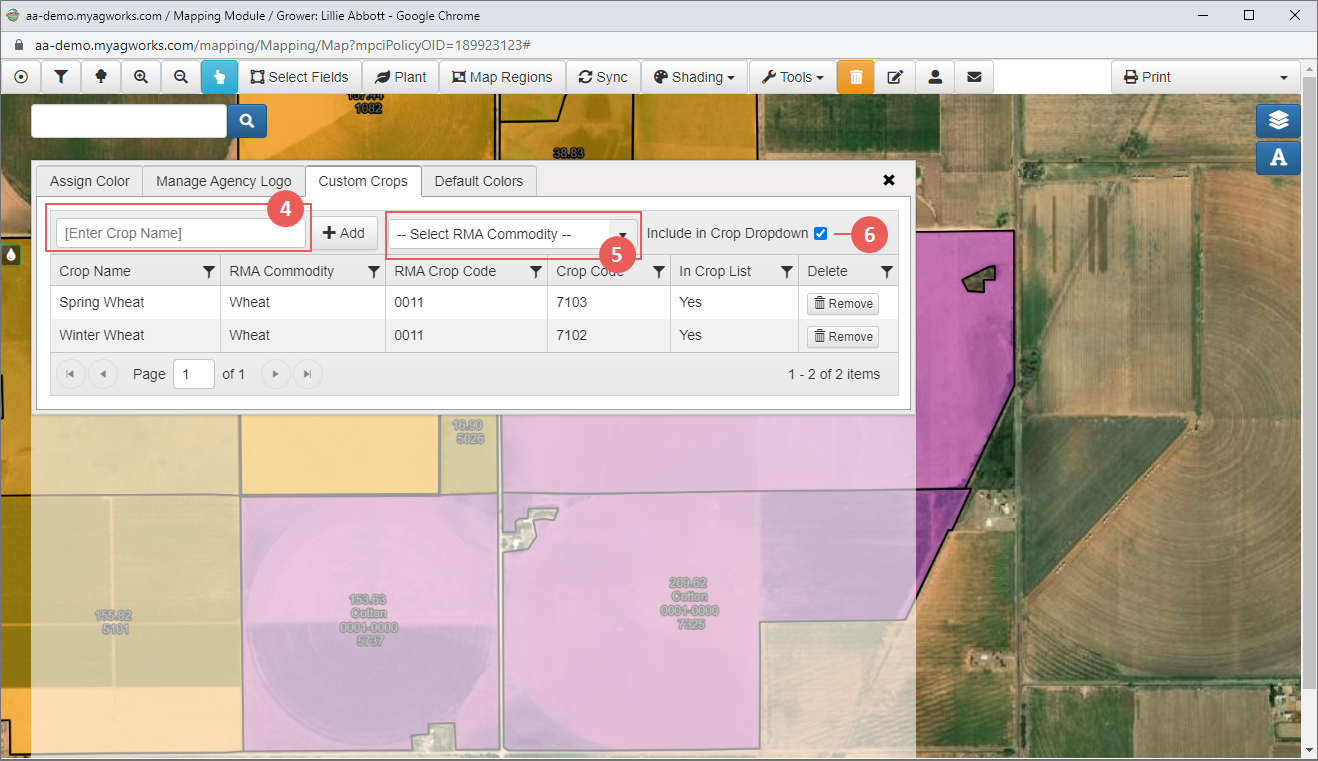
Select the Custom Crops tab. |
|
4.
|
In the [Enter Crop Name] textbox, type in the name of a custom crop you want to add to the Custom Crops (Pasture, for example). |
|
5.
|
To connect the crop you entered to a specific RMA Commodity (for auto-matching of Precision Ag records to planting records), select the corresponding RMA Commodity from the dropdown. On import of Precision Ag records, if there is a match between the text of the commodity name to the custom crop listing, then use the selected RMA commodity code to match to the correct policy/coverage/premium line for the crop. For example, if the custom crop name is "Fuji Apples" but the RMA Commodity that Precision Ag records should match is "Apples". |
|
6.
|
To have the crop display in the Plant panel, mark the Include in Crop dropdown checkbox. |
|
7.
|
Click + Add. The System will add the new crop to the list and assign an internal/custom crop code to it. |
Then, to add a color to the crop, select the Assign Color tab. Search for your new custom crop and add it to your list and assign a color like any other standard crop.
