|
1.
|
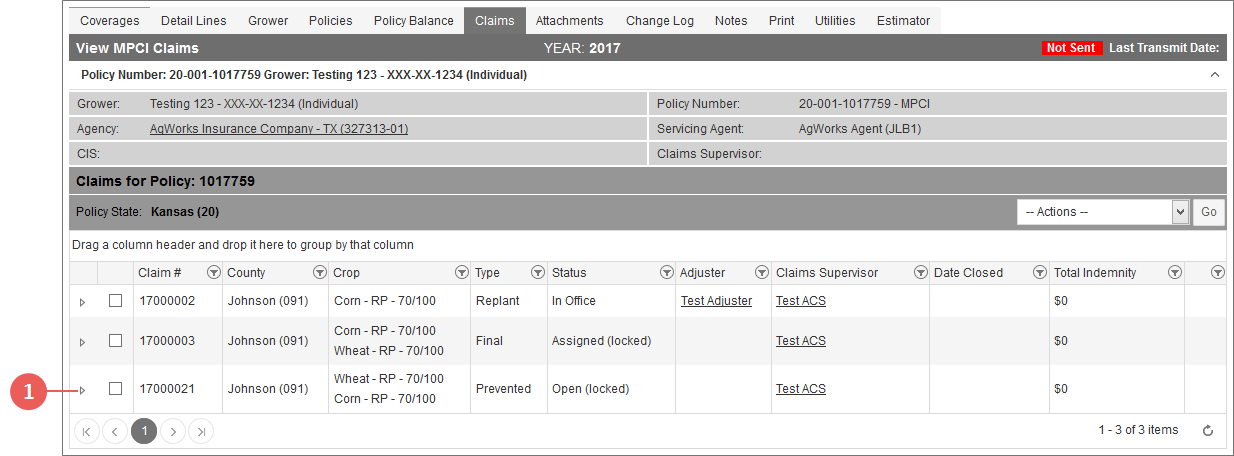
On the View MPCI Claims page, in the Claims for Policy grid, click the arrow for the claim you want to edit the NOL of. The claim expands in the grid to show additional sub grids. |
|
2.
|
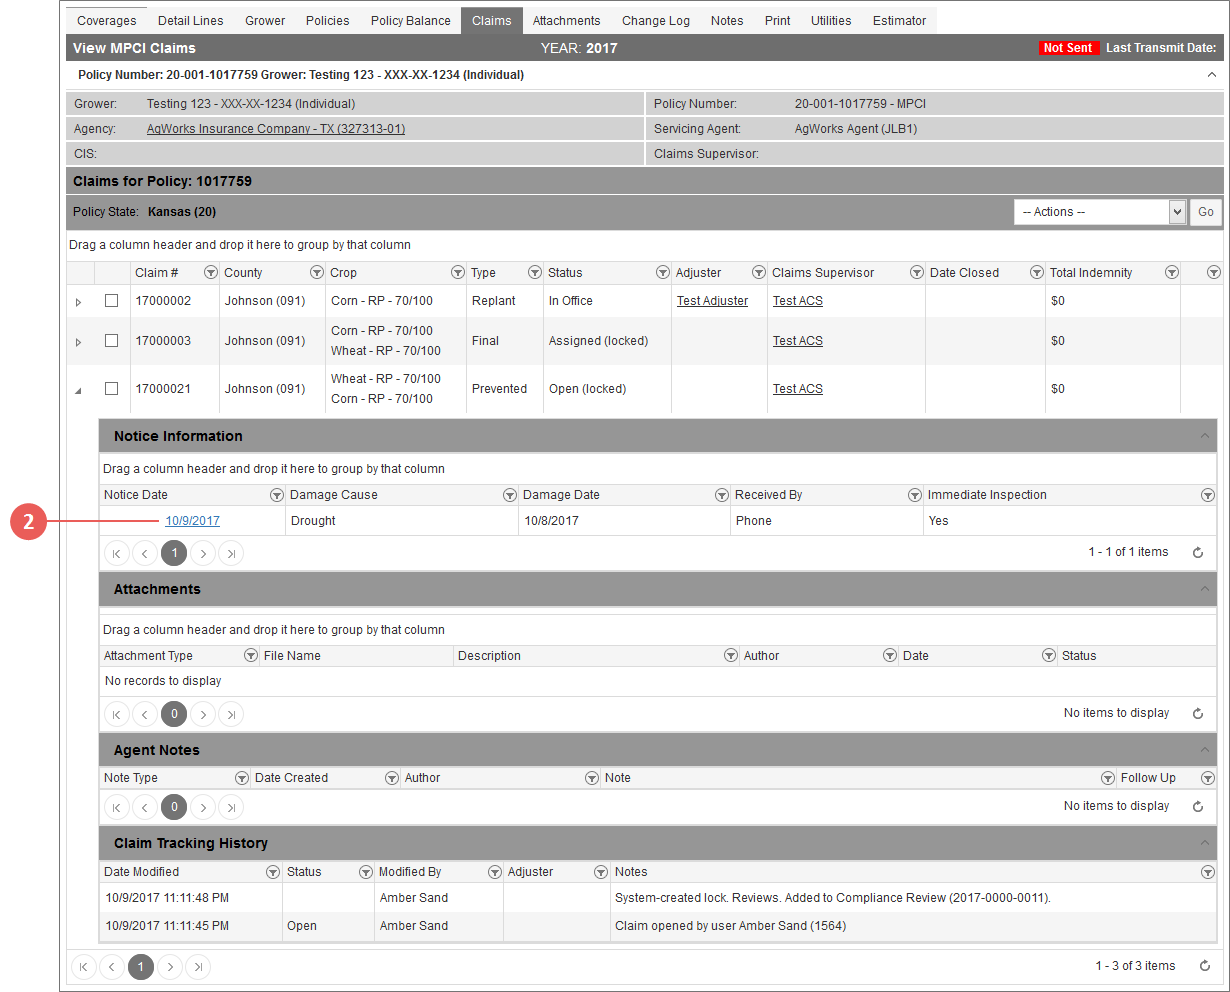
In the Notice Information grid for the claim, click the Notice Date hyperlink for the NOL you want to edit. The Edit MPCI Notice of Loss page opens. |
|
3.
|
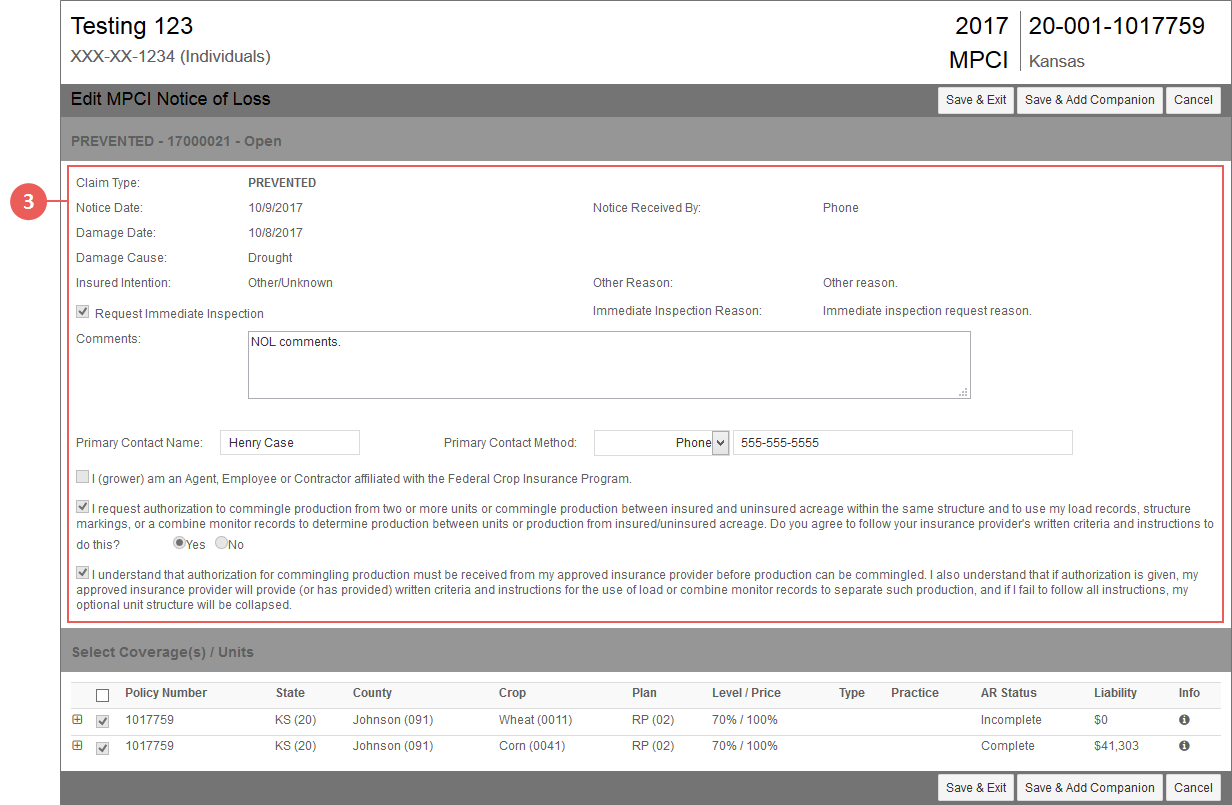
In the top section of the page, edit any available fields as needed. |
|
4.
|
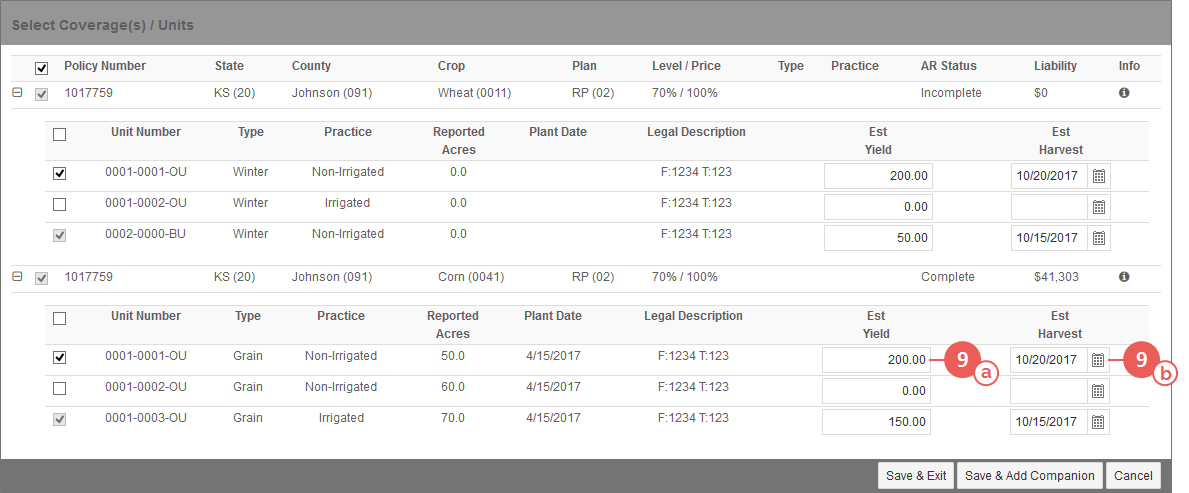
In the Select Coverage(s) / Units section, edit the coverages and units for the notice as needed. The available options for editing coverages/units in this section may very depending on your system permissions. |
|
5.
|
If you need to remove a coverage from the notice, click the red minus sign (-) for the coverage, if available. The System begins removing the coverage from the NOL. Once done, the Select Coverage(s) / Units section refreshes, and the coverage is no longer selected. Repeat for any other coverages you need to remove. |
|
6.
|
If you need to remove a unit from the notice, click the plus sign (+) to the left of the policy number to expand the coverage. Then, in the sub-grid, click the red minus sign (-) for the unit, if available. The System begins removing the unit from the NOL. Once done, the Select Coverage(s) / Units section refreshes, and the unit is no longer selected. Additionally, any values entered in the fields for the unit return to their default settings. Repeat for any other units you need to remove. |
|
7.
|
If you need to select a coverage to add to the notice, select the checkbox for the coverage in the grid. Multiple coverages can be selected, if available. |
|
8.
|
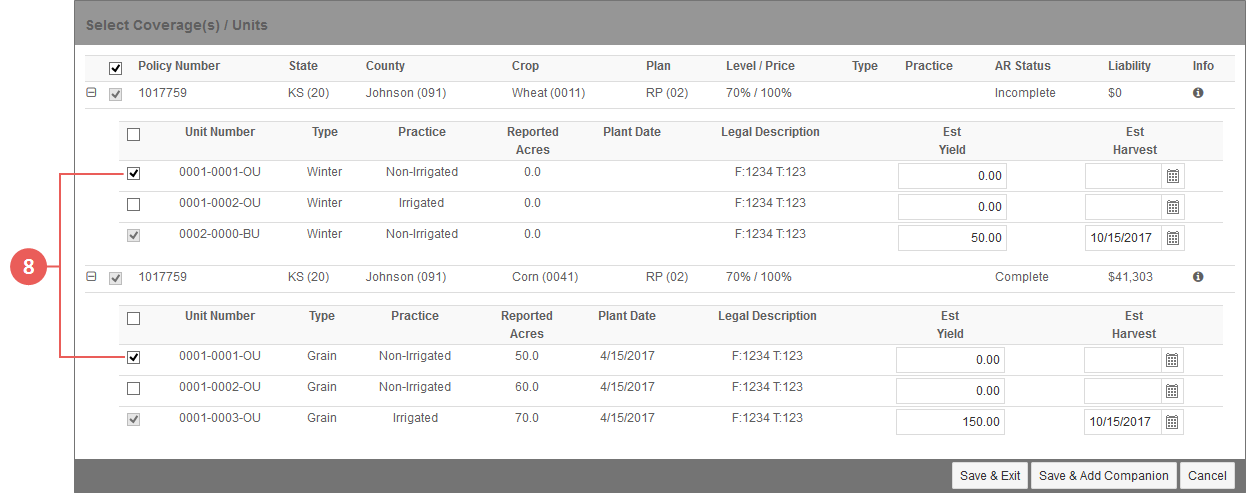
If you need to select a unit to add to the notice, click the plus sign (+) to the left of the policy number to expand the coverage. Then, in the sub-grid, select the checkboxes for any units associated with the loss. If units for more than one coverage need to be selected, repeat this process for each additional coverage. |
|
9.
|
If you need to edit the fields for a unit you selected or that was previously selected, do the following: |
|
a.
|
In the field available in the Est Yield column for a unit, type the estimated yield for the unit. |
|
b.
|
In the field available in the Est Harvest column for the unit, type the estimated harvest date or use the calendar tool to select the date. |
|
c.
|
For Replant claims only, if the replant acres for the unit exceed 50.0, in the Replant Acres Exceed 50.0? column for the unit, select the available checkbox. |
|
d.
|
Repeat steps a-c as needed for any units you selected or were previously selected for each coverage. |
|
10.
|
For Final and Replant claims only, if a coverage you selected or selected units on qualifies for SC (Simplified Claim or Self-Certified Replant), select the checkbox in the SC Claims column for the coverage. If more than one coverage is available in the Select Coverage(s) / Units section, this checkbox will be automatically selected for all coverages where SC is allowed for the crop/coverage. |
NOTE: This checkbox will only be available for crops/coverages that allow SC. Additionally, the selection of this checkbox will not automatically select coverages for inclusion in the NOL.
|
11.
|
As your final step, click one of the following buttons: |
|
•
|
To save the NOL and return to the View MPCI Claims page, click Save & Exit. Updates made to the NOL, if any, are saved to the claim(s). |
|
•
|
To cancel your changes and return to the View MPCI Claims page, click Cancel. No claims will be created or edited. |
