Related
Key Production in Fast Edit PR
| 1. | Locate and open a policy, and then navigate to the Detail Lines tab. You can open the Detail Lines tab in one of two ways: a) click the View hyperlink under the Detail Lines column for the coverage, or b) select the Detail Lines tab. The View MPCI Detail Lines page opens for the first coverage on the policy. To change the coverage, select a different coverage from the dropdown next to the Detail Line Information label. |
| 2. | In the top-right corner of the View MPCI Detail Lines page, click Fast Edit PR. The Fast Edit APH page opens for the coverage that was displayed on the Detail Lines tab and expands to display its detail line(s), or unit(s). Other coverages on the policy are also shown in collapsed banners (see "At a Glance: Fast Edit PR" for more information on the layout). |
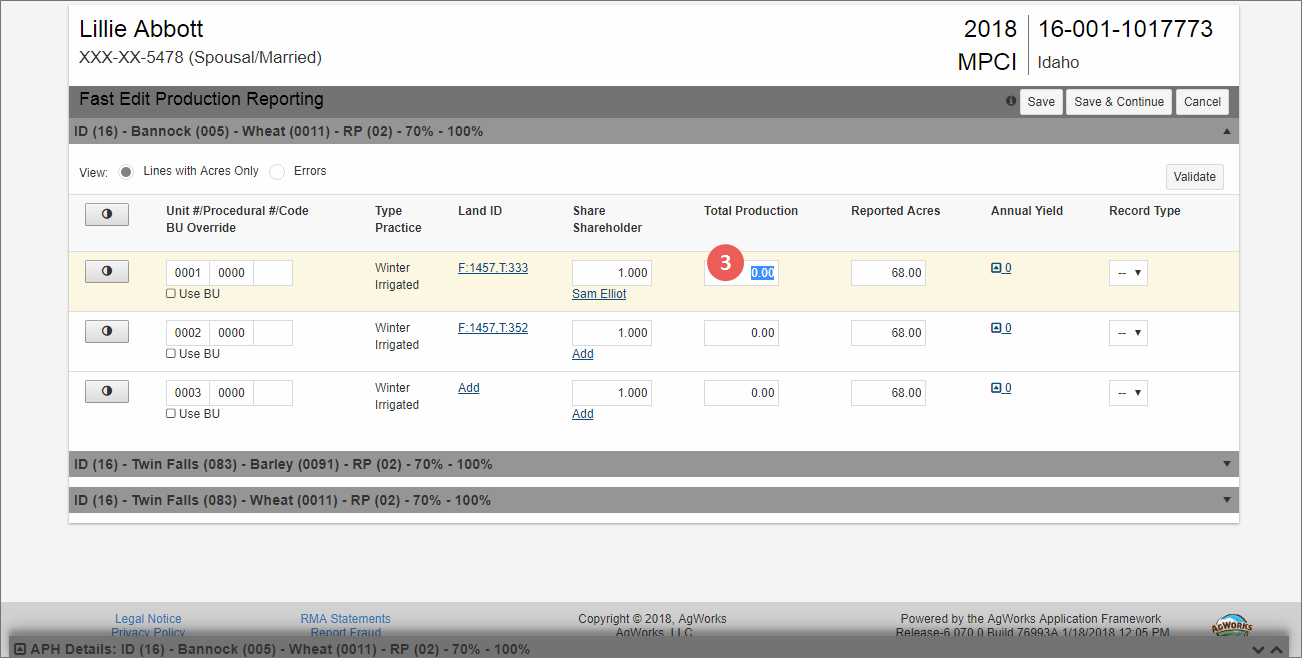
| 3. | For each detail line that you need to add production for, in the Total Production field, type the production amount. |
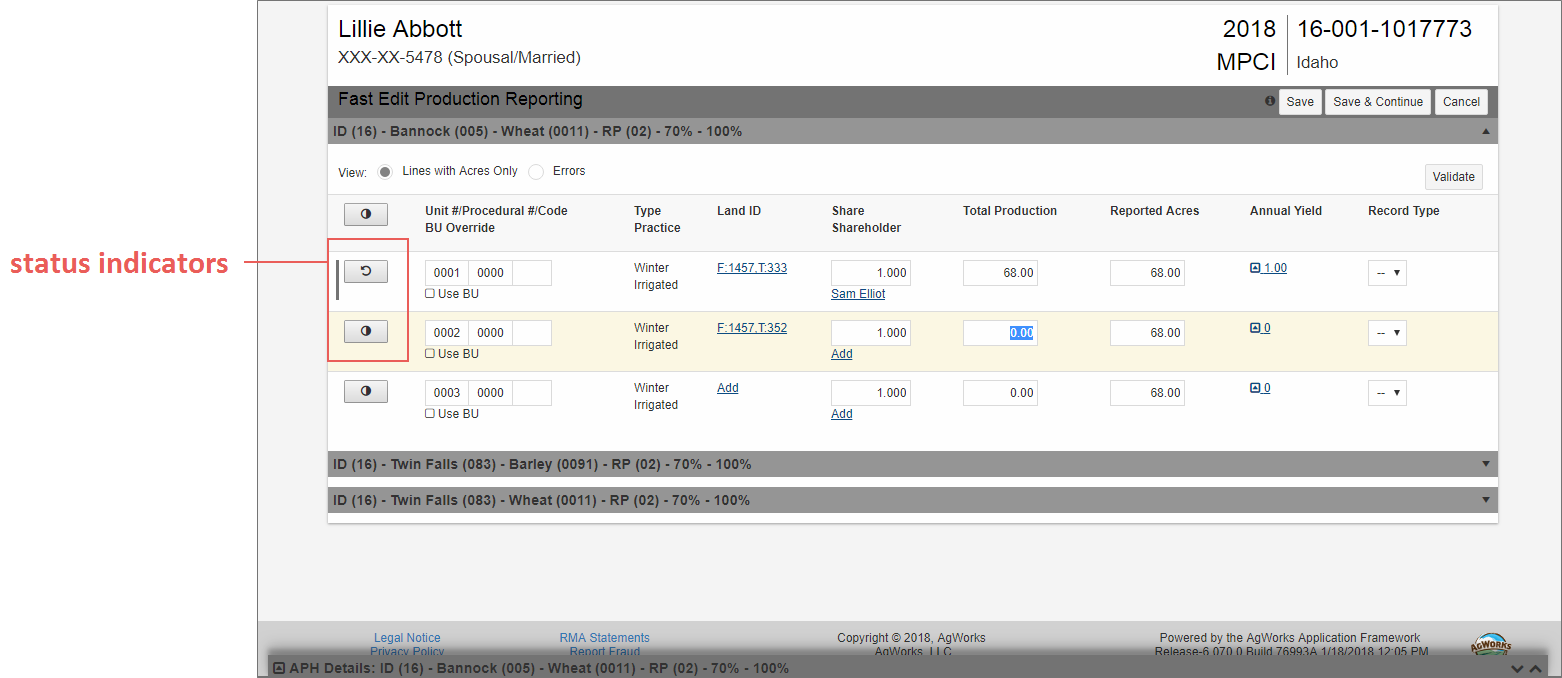
| As you edit the detail line, the status indicator changes from "unmodified" to "modified". |
For each detail line in Fast Edit PR, a status indicator is shown to the far left. This indicator visually represents whether or not a line has had any changes made to it. As you add production or make other changes to a detail line, this indicator will change.
When no changes have been made to the detail line or the associated APH, the “unmodified” indicator displays. All lines will display as “unmodified” when you first enter Fast Edit PR. When changes have been made to the detail line or associated APH, the Status Indicator automatically changes from “unmodified” to “modified” so you can easily keep track of production detail lines that contain new or changed values.
| Unmodified | Modified |
|---|---|

|

|
With “modified” lines, if you need to undo changes made, you can click the “modified” status indicator to revert changes back to their previous states, and the “unmodified” status indicator will again display.
You can manually change the “modify” indicator for a line in order to include it in the validation process by clicking the “unmodified” status indicator to change it to “modified”. Doing this will allow the System to pick up the detail line for validation when you save changes or choose to manually validate the line.
| 4. | From the Record Type dropdown, select the record type for the entered production. This is required. |
| 5. | Press TAB to move to the Reported Acres field for the detail line. If acres were previously reported, they are displayed here. Add or edit the acreage as need. |
| 6. | To selected record type for the production, from Record Type dropdown, select the record type that applies. |
| 7. | Press TAB to move to the next detail line on the coverage. Continue tabbing through each detail line on the coverage to add production and reported aces as needed. |
| 8. | After production has been entered for the last coverage, the System will move the cursor to the Save button. Click Save. |
NOTE: When reporting production for the current year for stand-alone STAX or MP or ARPI, the production values are pushed to the next RY by adding the RY values as a new row in the next year's APH-like record.
Once production has been entered, it can be validated and/or saved.

