|
1.
|
Go to: Estimator > Quick Estimates > Quick Crop Hail Estimate or Estimator > Quick Estimates > View Quick Estimates > select "Create Quick Crop Hail Estimate" from the --Select Quick Estimate to Create-- dropdown. The Create Quick Crop Hail Estimate page opens. |
|
2.
|
In the Coverage Information section, select a Year and State to use for the estimate. These fields are required. |
|
3.
|
If desired, before moving onto the Scenario Information section, in the Estimate Name field, give the estimate a name using up to 60 characters that will help you identify it among other estimates on the View Quick Estimates page later. |
|
4.
|
In the Scenario Information section, from the County dropdown, select the county to use for the estimate. This field is required. |
|
5.
|
From the Crop dropdown, select the crop to include in the estimate. This field is required. |
|
6.
|
From the Policy Forms dropdown, select up to 5 forms to include in the estimate. The forms shown are those available to the selected state. If only one policy form exists, it is selected automatically. Once selected, forms will display to the right of the field. You must select at least one form. |
|
7.
|
From the Endorsements dropdown, select up to 5 endorsements to include in the estimate. The endorsements shown are those available to the selected state/county. Once selected, endorsements will display to the right of the field. |
|
8.
|
If the selected state offers cash discounts, the Cash Discount? checkbox displays. Select this checkbox to have the System apply the cash discount for the selected state. |
|
9.
|
To change how the scenario is broken down when calculated, select either the "Totals" or "Per Acre" View By option. |
|
10.
|
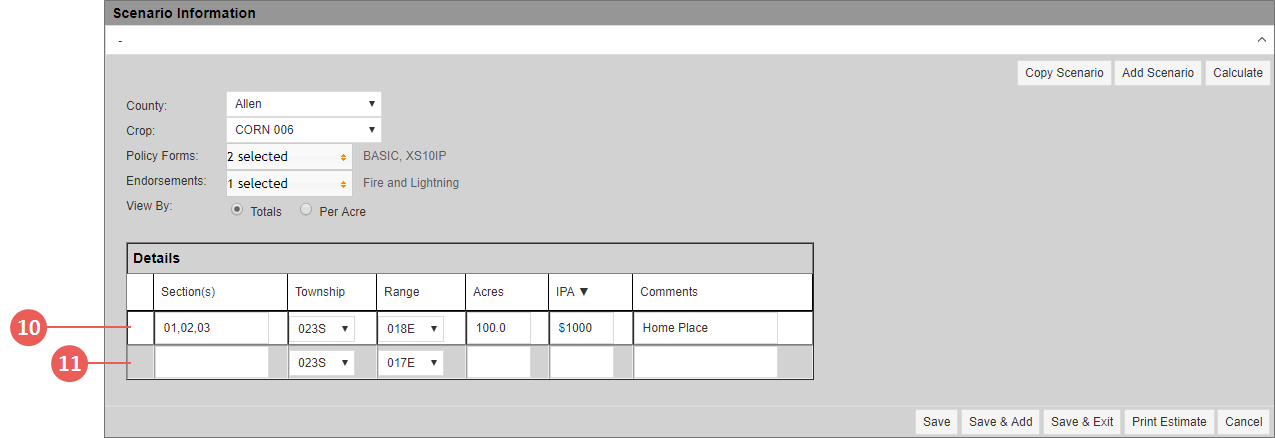
In the Details grid, provide the following details for the land to include in the scenario. Once you beginning typing, another blank row appears: |
|
•
|
Section(s): Type the land's two-digit section number(s). There is no limit to the number of sections that can be included; however, each number must be separated by a comma (e.g., "01, 02, 03, 04"). |
|
•
|
Township, and Range: These fields automatically default to the highest value but can be changed as needed. Select the township and range from the corresponding dropdowns. |
|
•
|
Acres: Type the acres to use in calculating the estimate. |
|
•
|
IPA: Type the whole dollar amount to use for the Insurance per Acre. This must be greater than $0. This field is required. |
|
•
|
Comments:Type comments using up to 25 characters to help distinguish this row from other rows in the grid. |
|
11.
|
Repeat Step 10 for each land unit you want to include in the scenario. |
|
12.
|
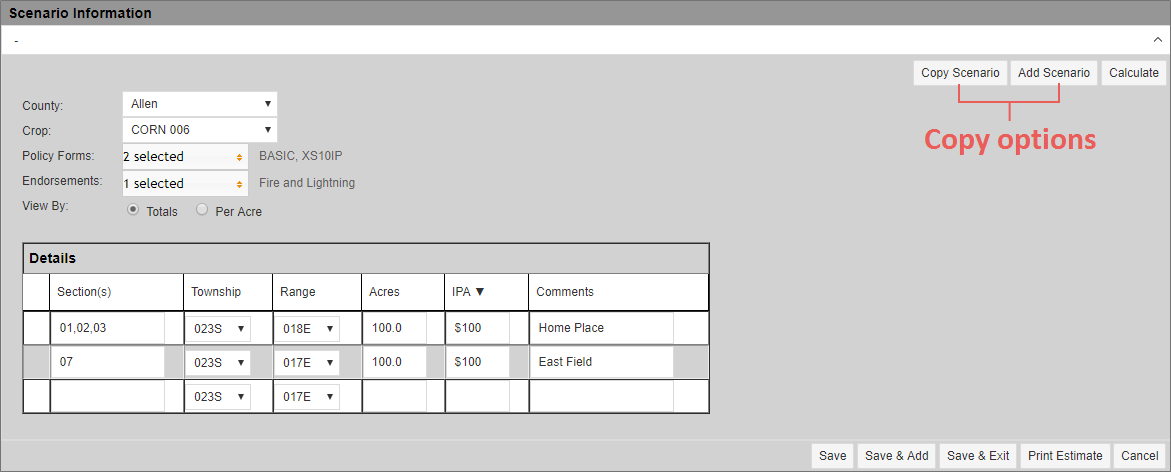
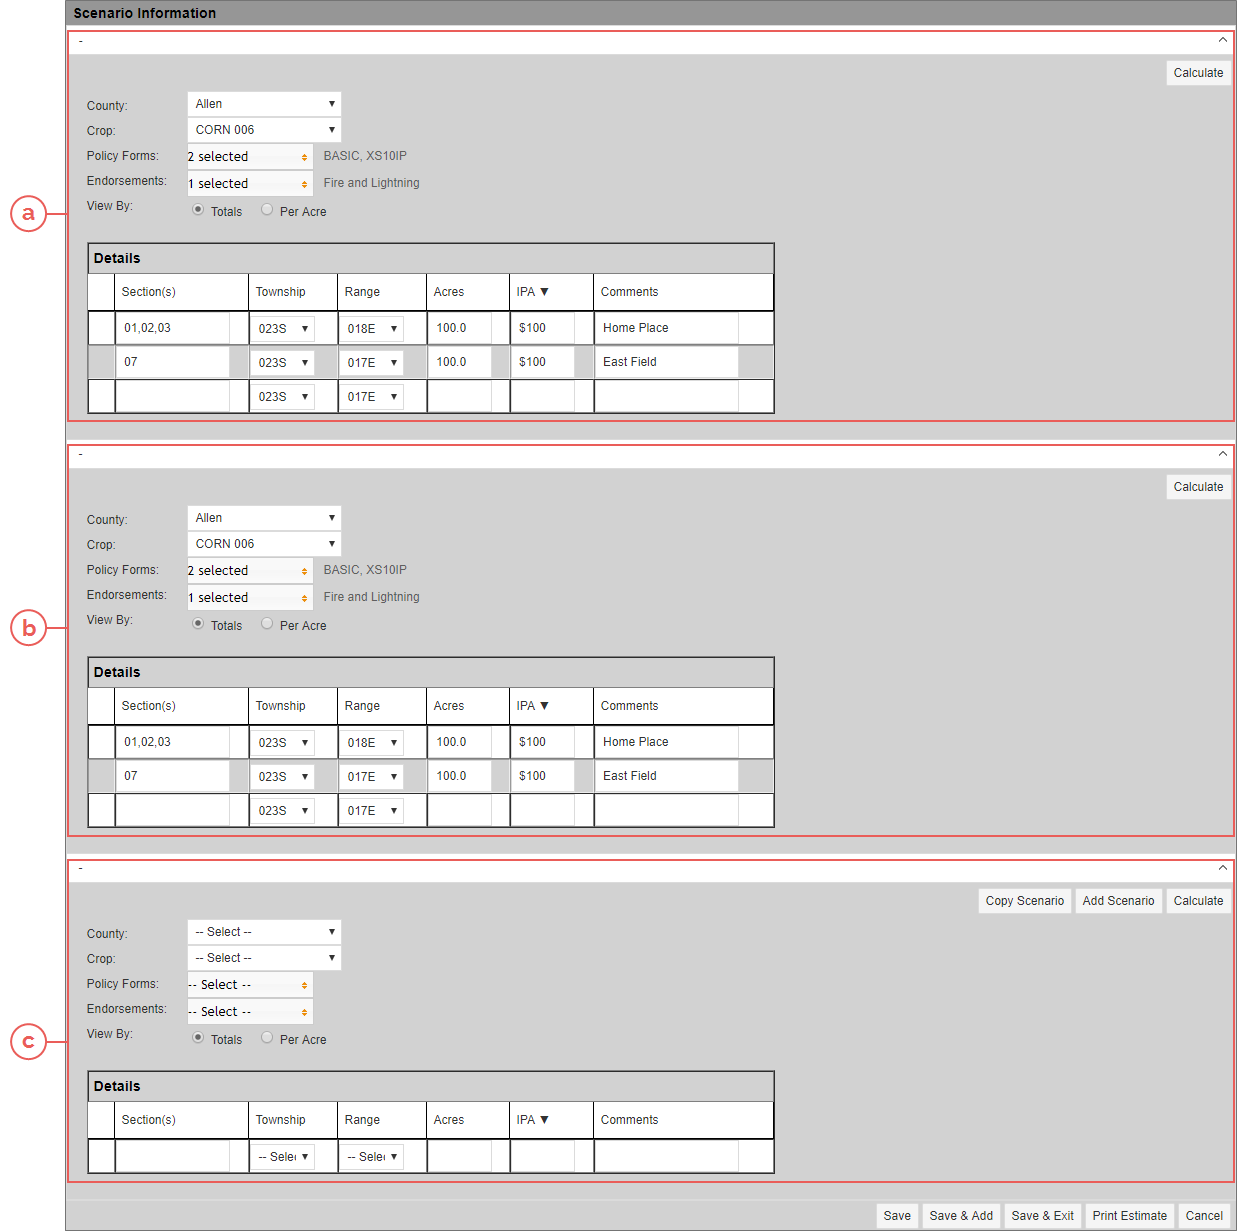
To create another to scenario for the estimate, you have two options: Copy Scenario or Add Scenario. These buttons only appear for the final scenario. |
|
•
|
Copy Scenario: The System copies the scenario that corresponds with the Copy Scenario button and adds it below the last created scenario. |
|
•
|
Add Scenario: The System will add a new blank scenario below the last created scenario. |
Above, the top section (a) was the original scenario, the middle section (b) was the scenario copied from a, and the bottom section (c) was the added scenario.
|
13.
|
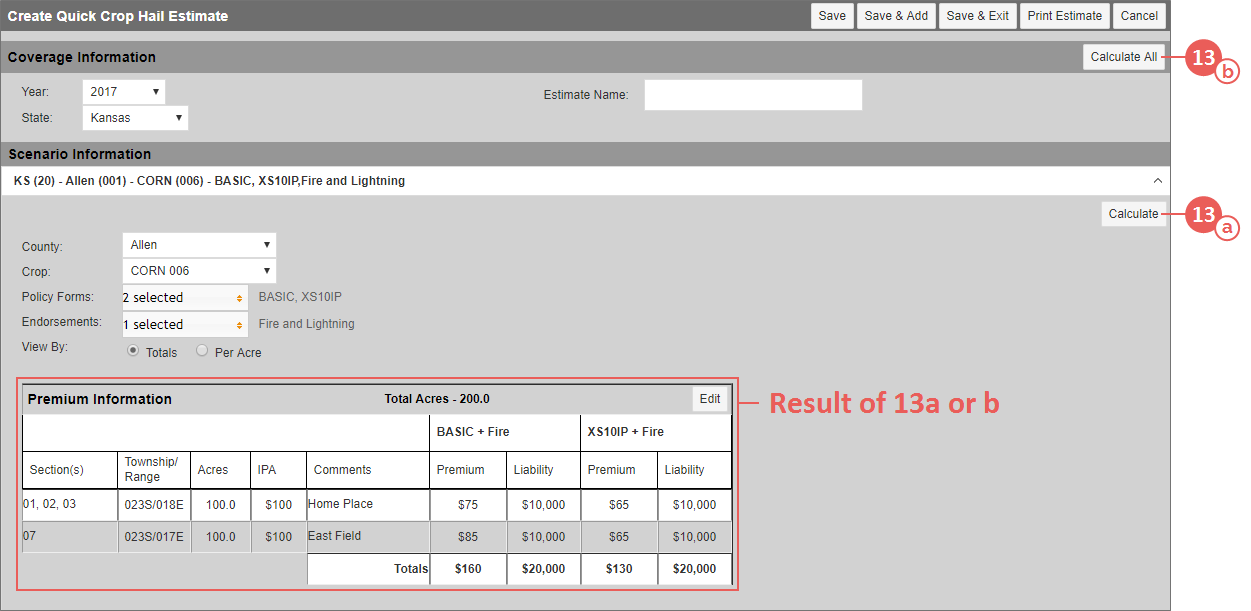
To calculate scenarios in the estimate, you have two options: calculating a single scenario or calculating all scenarios. |
|
a.
|
To calculate a single scenario in the estimate, click the Calculate button that corresponds with that scenario. The Premium and Liability are calculated for each unit on each form and then summed. |
|
b.
|
To calculate all scenarios in the estimate, click the Calculate All button at the top of the estimate page. The Premium and Liability are calculated for each unit on each form and then summed. |
|
14.
|
To edit a scenario once it has been calculated, click the Edit button in the Premium Information grid that corresponds with the scenario. Make changes to the scenario as necessary and then calculate the single scenario (or all scenarios) again. |
|
15.
|
When you've completed your estimate(s), click one of the following: |
|
•
|
Save: Saves the scenario(s), displays the Print button, and you remain on the Create/Maintain Quick Crop Hail Estimate page. |
|
•
|
Save & Add: Saves the scenario(s) and opens a new Create Quick Crop Hail Estimate page so you can add another estimate. |
|
•
|
Save & Exit: Saves the scenario(s) and closes the Create/Maintain Quick Crop Hail Estimate page. You are taken to the View Quick Estimates page. |
|
•
|
Print Estimate: Prints the Quick Crop Hail Estimate Information report to a PDF that downloads to your browser window. |
|
•
|
Cancel: Closes the Create/Maintain Quick Crop Hail Estimate page without saving the estimate and its scenarios. You are taken to the View Quick Estimates page. |
|
|
After saving, the System assigns an estimate number to the record. All estimate numbers are 7-digit numbers, sequentially assigned, that end in the letter “E”. For example,"0000000E" and "0000001E" would indicate the first and second estimates built within the System. Along with the estimate number, the user and date created are also saved with the estimate. |


