Related
Draw a Field
All Reinsurance Years
If the CLU Layer fields do not accurately portray the policyholder’s planted fields, then a user can use the Draw tool to create polygonal fields. Combine this with one or more of the other tools to create the most realistic view of a policyholder's acreage.
| 1. | Open the policy for the grower and select the Map tab. The Mapping window opens for the policyholder and zooms to a view of the fields associated with the policyholder. |
| 2. | Zoom to the location where you want to draw a field. |
| 3. | In the Map window, click Tools and then select “Draw Field”. A small dot appears on the end of the cursor. |
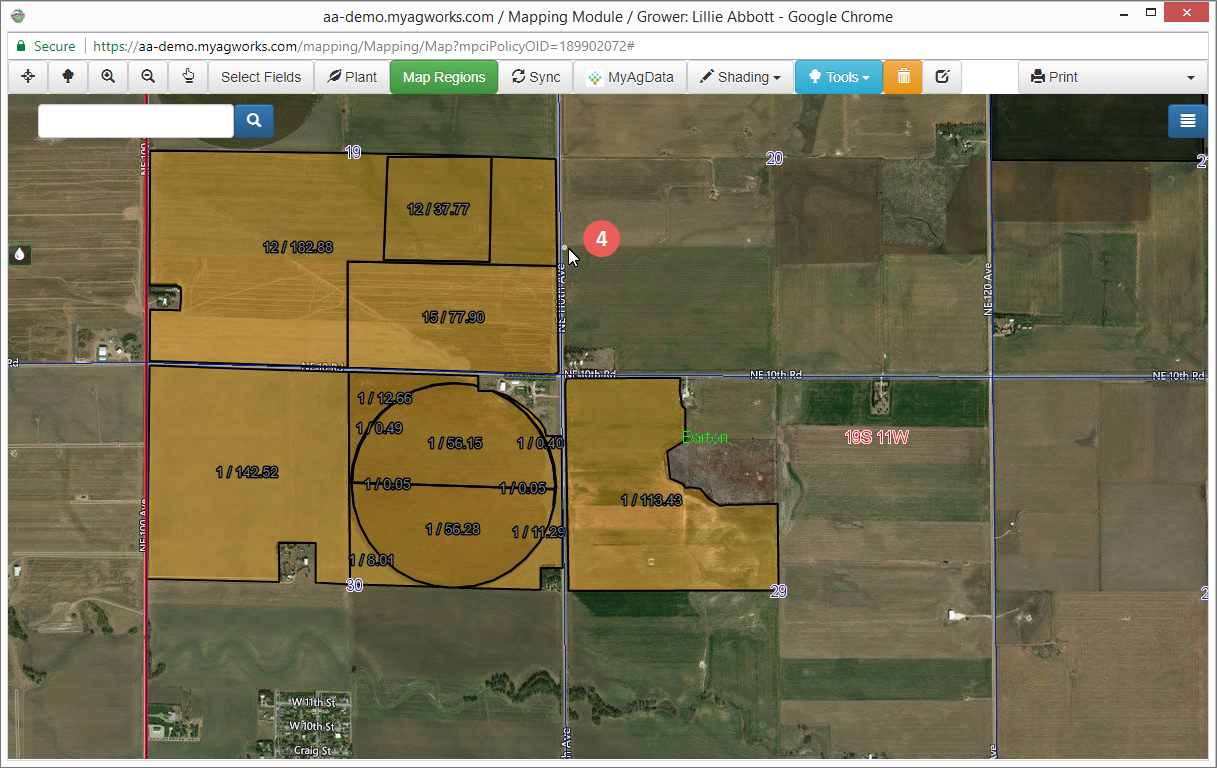
| 4. | With your cursor, double click in the location where you want the field to begin and then drag the cursor to the next point to create the first side of the polygon. |
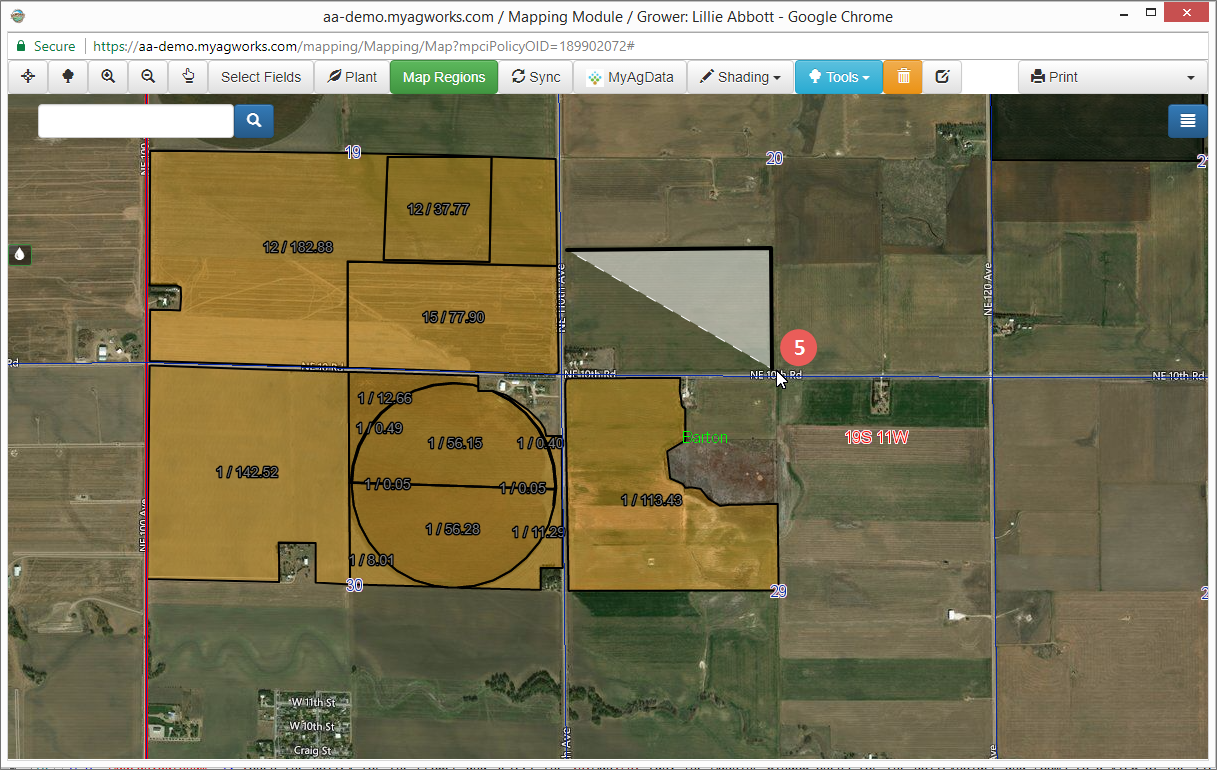
| 5. | Continue to drag and double click until all sides of the polygon have been drawn. |
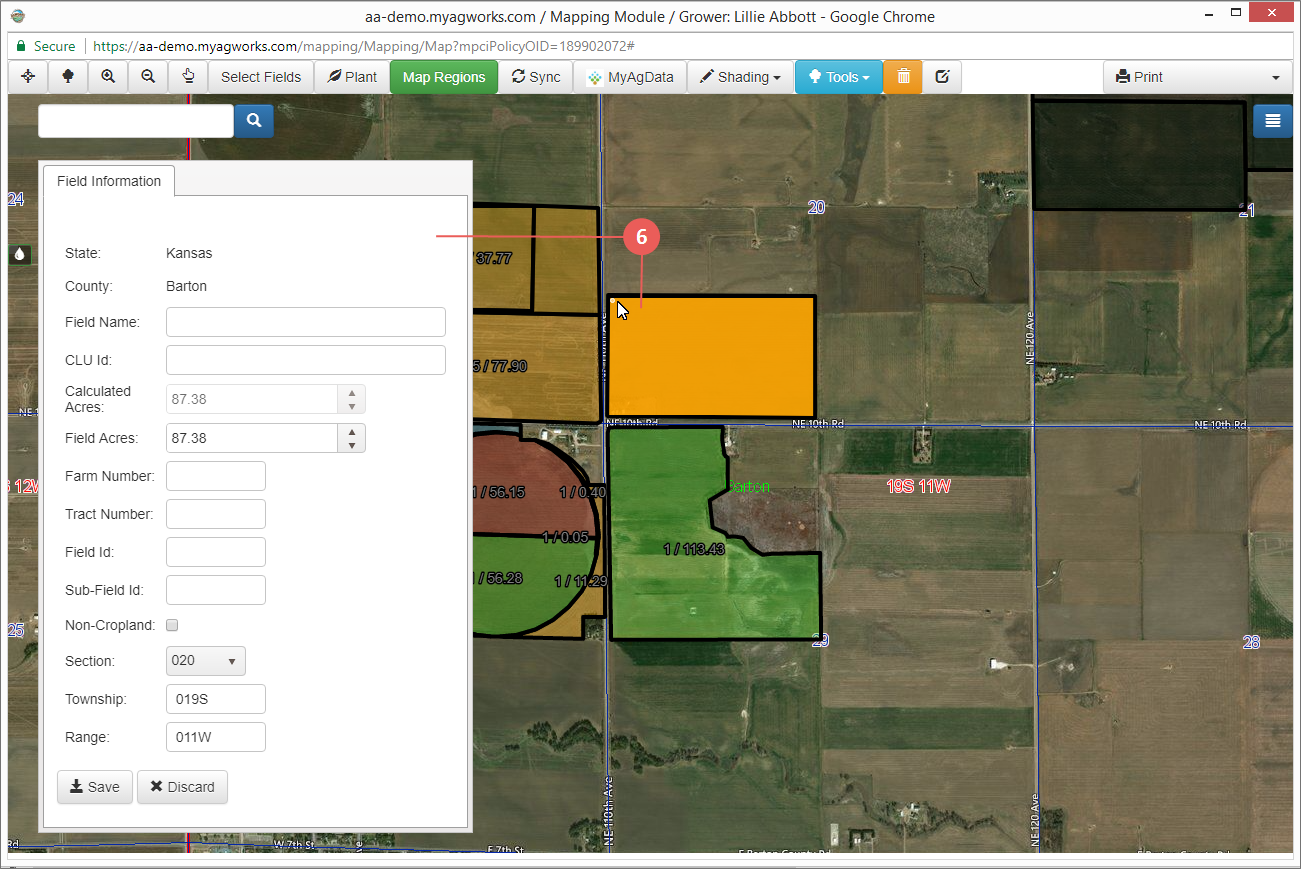
| 6. | On the last point, double click to close the shape. The field is highlighted in solid orange, and the Field Information panel opens. |
| 7. | In the Field Information panel, enter the following information about the drawn field when applicable: |
| • | State: This value is read only. |
| • | County: This value is read only. |
| • | Field Name: Assign a name to the field if desired. |
| • | CLU Id: Type the CLU information for the new field. |
| • | Calculated Acres: This value is read only. |
| • | Field Acres: The Calculated Acres value is shown as the Field Acres value. This number can be edited if needed. Type the number of acres include in the drawn field. |
| • | Farm Number: Type the Farm Number associated with the drawn field. |
| • | Tract Number: Type the Tract Number associated with the drawn field. |
| • | Field Id: Type the Field Id associated with the drawn field. |
| • | Sub-Field Id: Type the sub-field ID associated with the drawn field. |
| • | Non-Cropland: To designate the field as non-cropland, mark this checkbox. Non-Cropland acres will have a fixed color and transparency of 60% opacity, with the color being slightly darker than the default field color. |
| • | Section: From the dropdown, select a different Section if necessary. |
| • | Township: The Township value for the selected field is displayed if applicable. This can be edited. |
| • | Range: The Range value for the selected field is displayed if applicable. This can be edited. |
| 8. | To save the drawn field, click Save. Or, to delete the drawn field, click Discard. |


