|
1.
|
Open the Custom Label layer and select the template panel. |
|
2.
|
From the Template dropdown, select the template to edit. Available label settings are divided into three options: Field Labels, Planting Labels, Label Style and Label Line Style. To access the options within each, click on the heading to expand or collapse the section. |
TIP: To remove the custom labels from all fields associated with the grower for the current policy, click Remove All.
|
3.
|
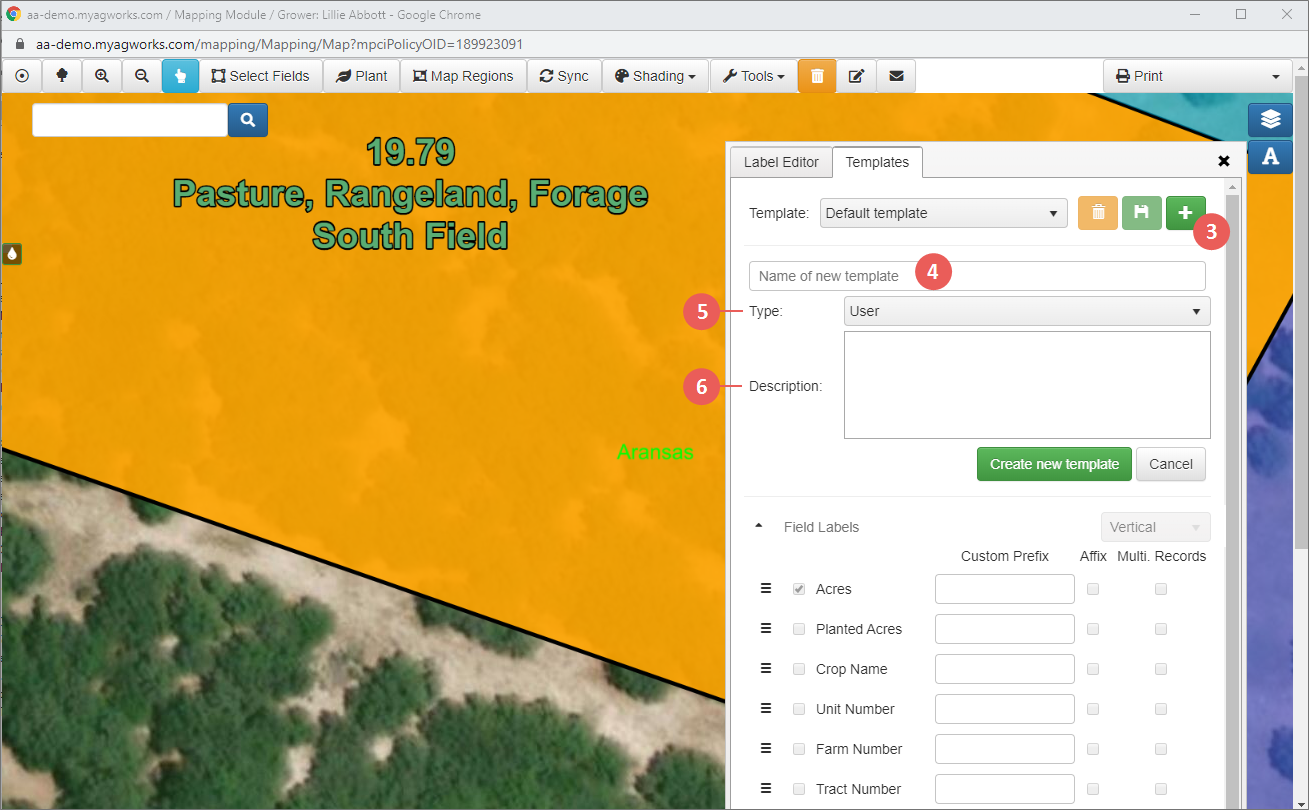
In the Field Labels and Planting Labels sections, from the list of available labels, select the checkbox that corresponds with the data you want to display on fields for the chosen template. For each selected label, you can choose to add custom text to the beginning or ending of the label data. |
|
|
For the Field Labels and Planting Labels types, you can select the stacking orientation for each, either "Horizontal" or "Vertical". Horizontal means that each field label (e.g., Acres, Farm Number) follows the preceding label in a horizontal line. Vertical orientation will stack on top of one another. Fields Labels default to "Horizontal", and the Planting Labels default to "Vertical". (The default template's stacking orientation cannot be changed.) |
|
•
|
To add custom label data to the beginning of a label, type the text in the Custom Prefix field. |
|
•
|
To place this custom text at the end of the label data, type the text in the Custom Prefix field but then select the Affix checkbox. |
NOTE: Labels shown with an asterisk are planting record level labels. If no planting record exists, no data will display for the label.
Field Labels
Planting Labels
|
4.
|
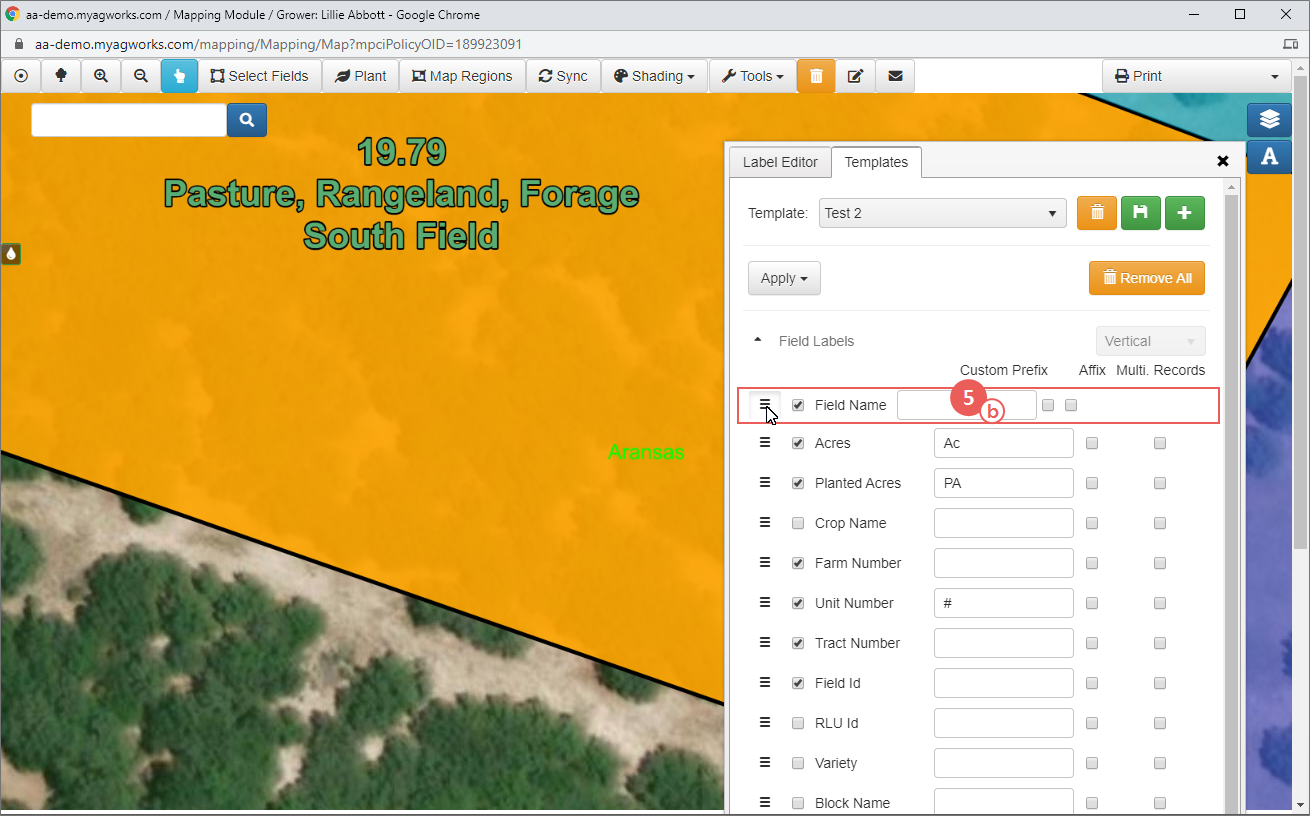
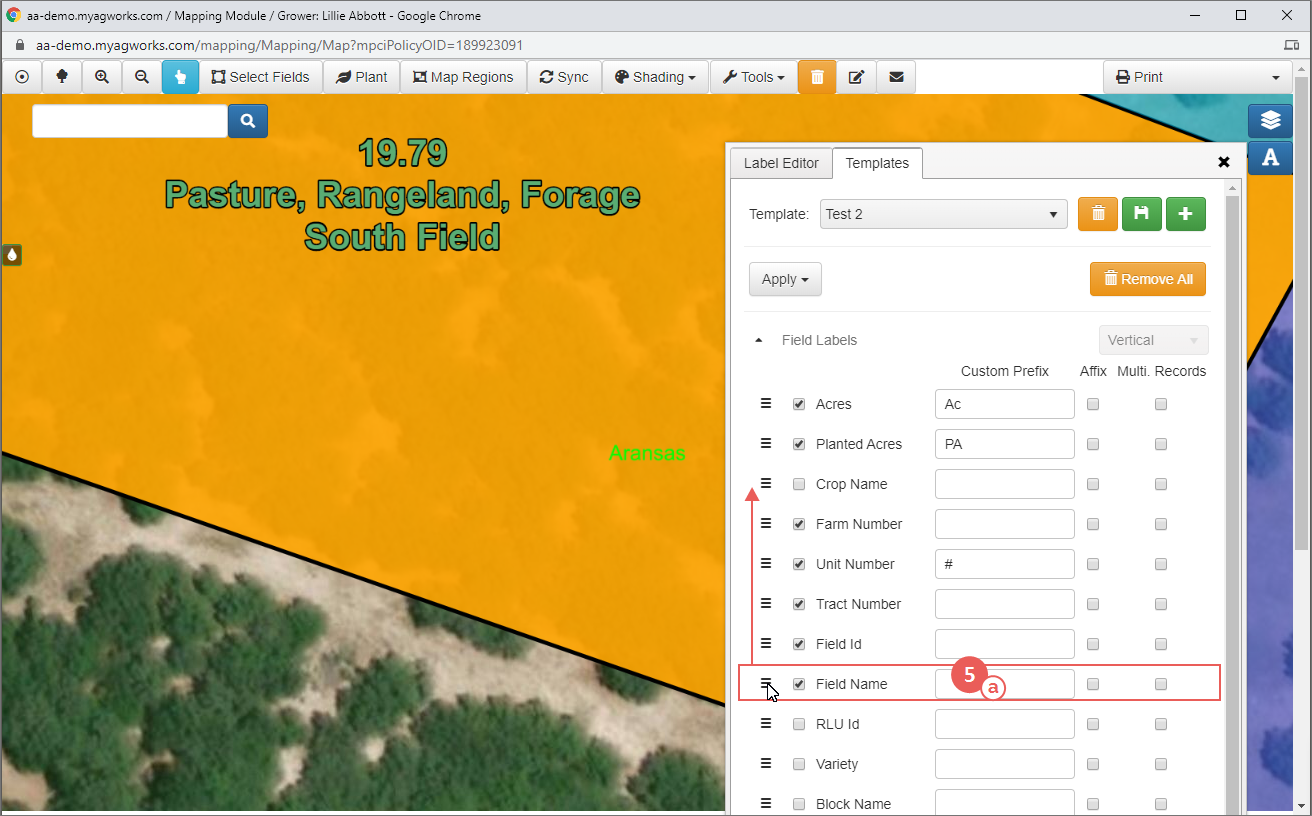
To reorganize the sequence in which the labels that are printed, select the horizontal bar icon ( ) next to a label (a) to drag the label up and down the grid to the desired location (b). Labels will print in this sequence on each field. ) next to a label (a) to drag the label up and down the grid to the desired location (b). Labels will print in this sequence on each field. |
|
5.
|
In the Label Style section, to further customize the label with different styles, make these additional selections: |
NOTE: The custom label displays beneath the orange layer. To view your custom label design in progress, click somewhere other than the current field (de-select the field). When ready to continue, select the relevant field again.
|
•
|
Font: Select a font from the Font dropdown. "Arial" is selected by default as it’s currently the only font option. |
|
•
|
Weight: Currently, only "Bold" is available. To bold the selected Font, click B. To remove bold, click B again. |
|
•
|
Size & Width:
To change the size of the font size and width of the label's outline, drag the respective sliders to adjust the option's value. |
|
•
|
Color & Outline: To select a color for the font and for the label outline, click in the respective field, and using the color slider, select a hue and then use the color picker to select a color value within that hue for the field's label. The selected color is displayed in the field. |
|
6.
|
In the Label Line Style section, to customize the dashed line visible when a label is manually moved off of its respective field (usually to improve visibility), make these additional customization selections: |
|
•
|
Width: To change the width (thickness) of the dash, drag the slider to adjust the option's value. |
|
•
|
Dash: To change the length of the line, use the spinner arrow in each of the two fields to choose a line length. The first field specifies the primary dash length and the second field specifies the space between dashes. |
|
•
|
Color: To select a color for the font and for the dash, using the color slider, select a hue and then use the color picker to select a color value within that hue for the dash line. The selected color is displayed in the field. |
|
7.
|
From the Apply dropdown , select whether to apply the template to the selected field(s) or to all fields. Once selected, the System will refresh to display the labels selected on the map surface. |
|
8.
|
To save the selections to the selected template, click the save icon ( ). ). |
 ) next to a label (a) to drag the label up and down the grid to the desired location (b). Labels will print in this sequence on each field.

