References to “Fast Edit AOI” are for “Fast Edit Assignment of Indemnity” and AOI are for “Assignment of Indemnity”.
|
1.
|
Open the Fast Edit AOI screen from Utilities tab > Fast Edit Assignment of Indemnity link OR from the Coverages tab of a policy that has an existing AOI, by clicking the hyper linked Creditor's Name or the Fast Edit Assignment Of Indemnity button. The Fast Edit Assignment of Indemnity page opens, displaying the policy from which the screen was opened. |
|
2.
|
Click Add, in the upper right corner above the grid, to open the Add New AOI panel for the policy. |
|
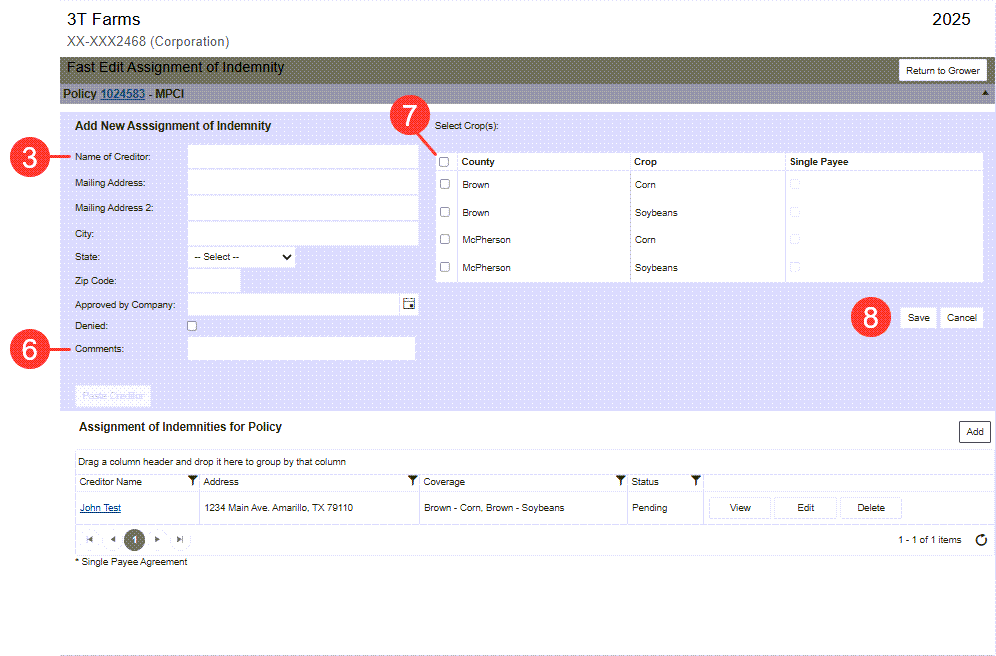
3.
|
In the Creditor information fields enter the Creditor's details. |
NOTE: Users with the edit access will see the Approved by Company date field and Denied check box.
|
4.
|
In the Approved by Company field, type the date in MM/DD/YYYY format or click the calendar button to open the calendar and select an approved date. |
|
5.
|
Select the Denied check box if the company has denied the AOI. |
|
6.
|
In the Comments field, type any important information. |
|
7.
|
In the table, select the applicable County and Crop check box for creditor. |
NOTE: If all County/Crop options apply for the Creditor, select the check box in the table header to select all options.
|
8.
|
Click one of the following buttons: |
|
•
|
To save the AOI for the Policy and display the record in the Assignment of Indemnity for Policy grid, click Save. |
|
•
|
To discard the new AOI and close the Add New AOI panel, click Cancel. |